
 Read Part 1 here
It took 10 hours to resaw the 1 1/4″ thick slabs into three thinner panels and then plane them to the finished 1/4″ thickness. In total, I cut 21 panels that will become inserts for the side and back assemblies.
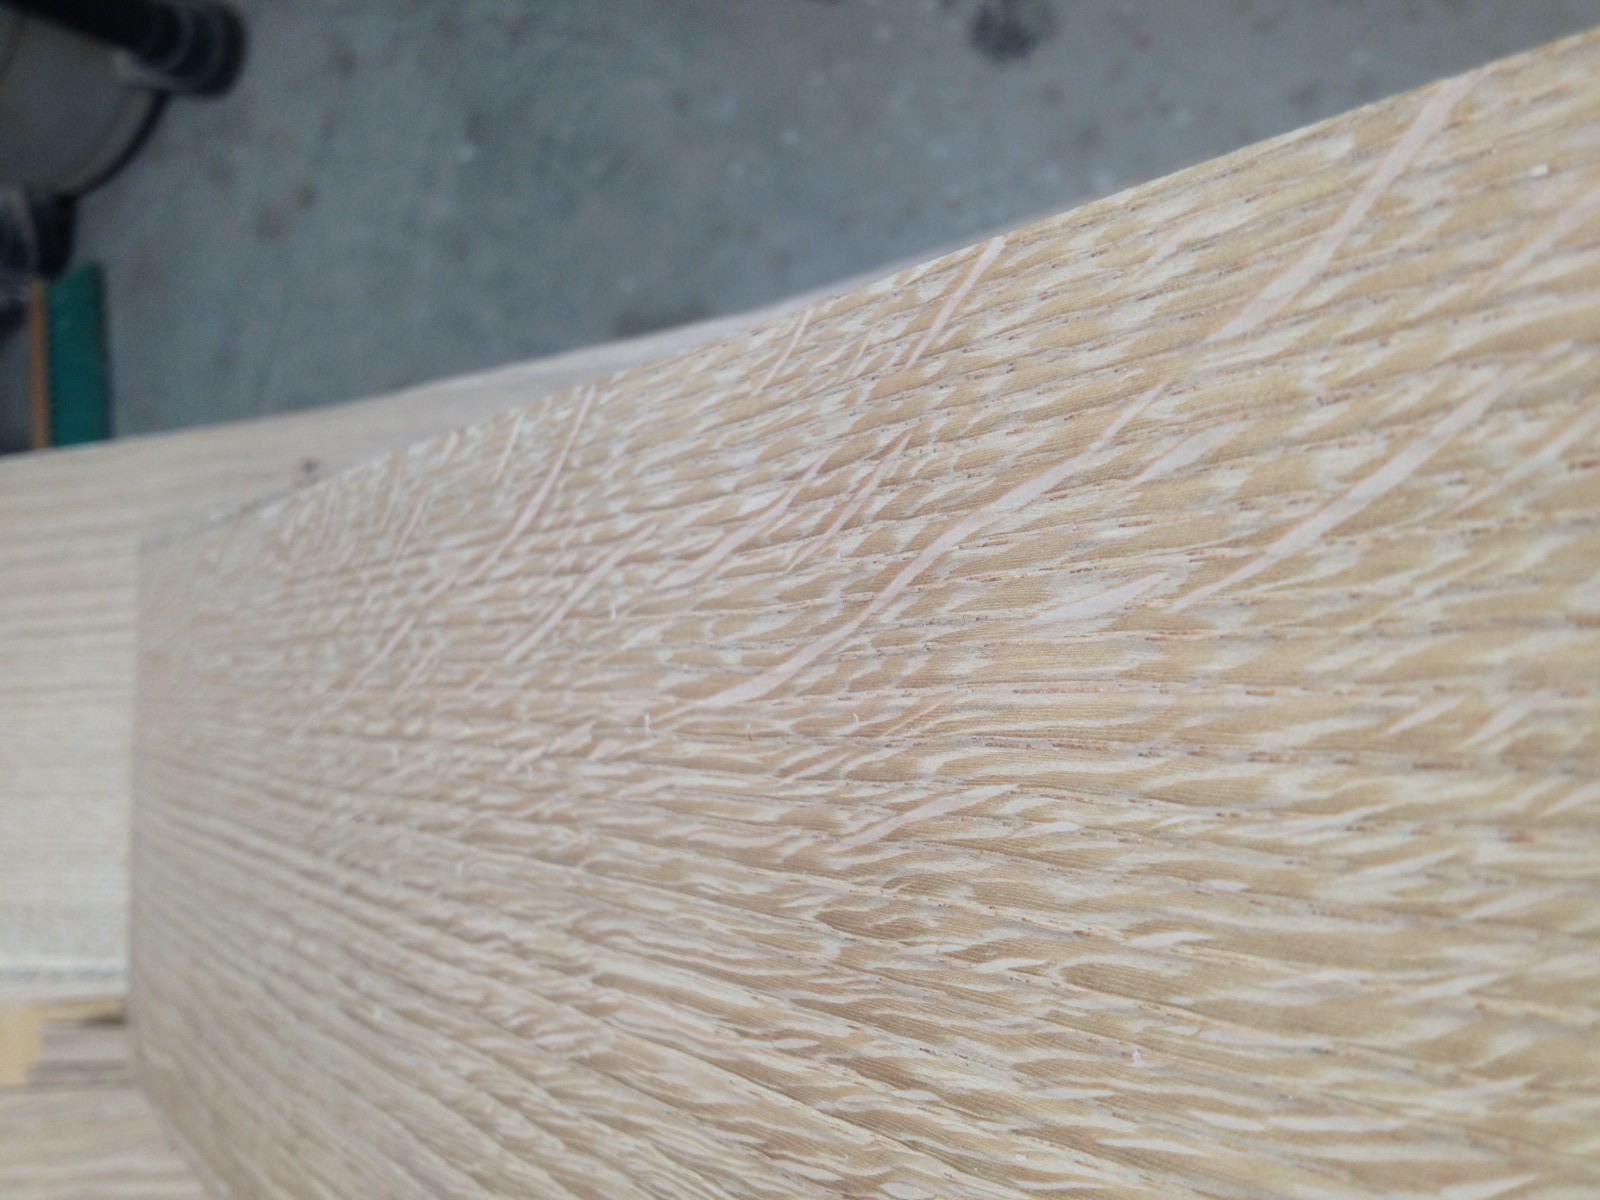
The quarter-sawn panels have some beautiful medullary ray patterns. You can click on the image for a full-size view.
Panels for the side assemblies
I also planed the stiles and rails down to 3/4″ thick, then the cut them to width and length.
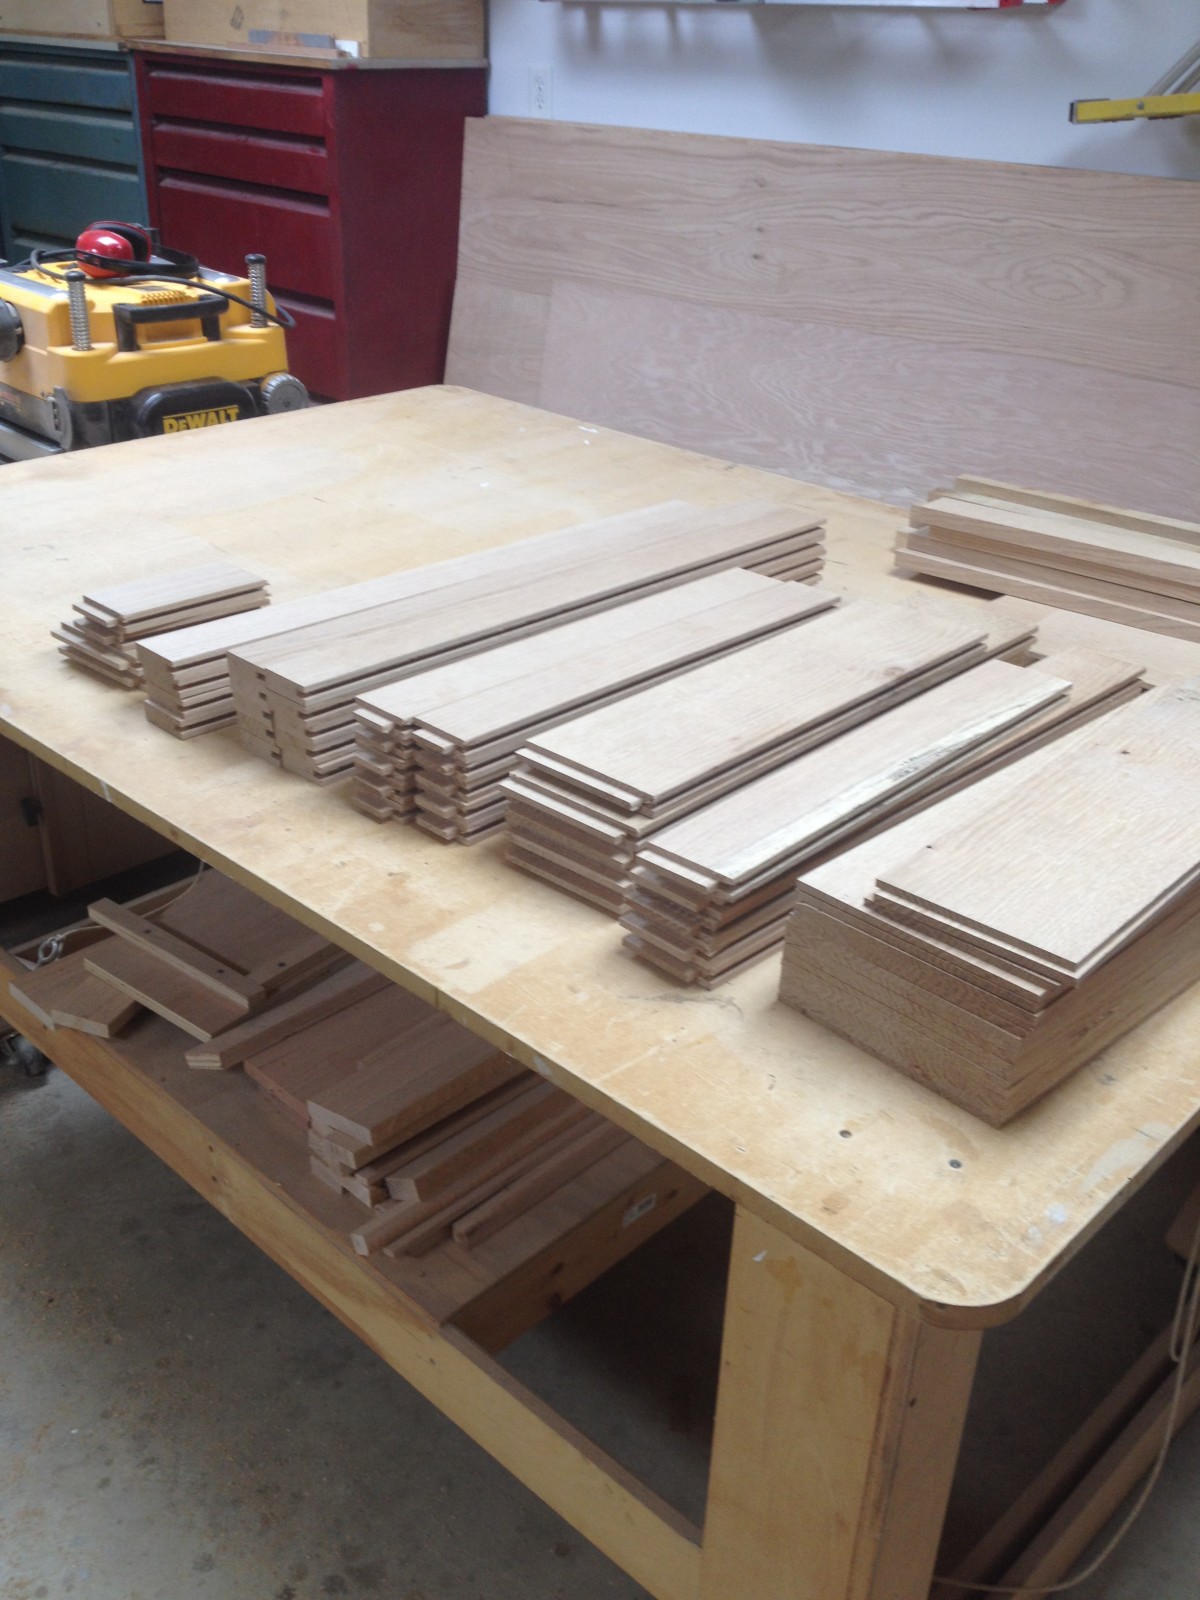
Parts for the side and back assemblies.
The next step was to cut a groove (mortise) in the parts to accept the center panel. The “wobble” dado blade made quick work of this step.
Finally, I cut the tenons on the ends of the rails to fit into the grooves.
Before signing off for the day, I dry-fitted one of the back panels just so I could see some light in the end of the tunnel.
I found that the tenons were slightly off and the overall width of the panel was about 1/16″ too wide.
Wanting this project to be perfect, I went back to the table saw.
I cut a little off of each tenon, and re-assembled the assembly.
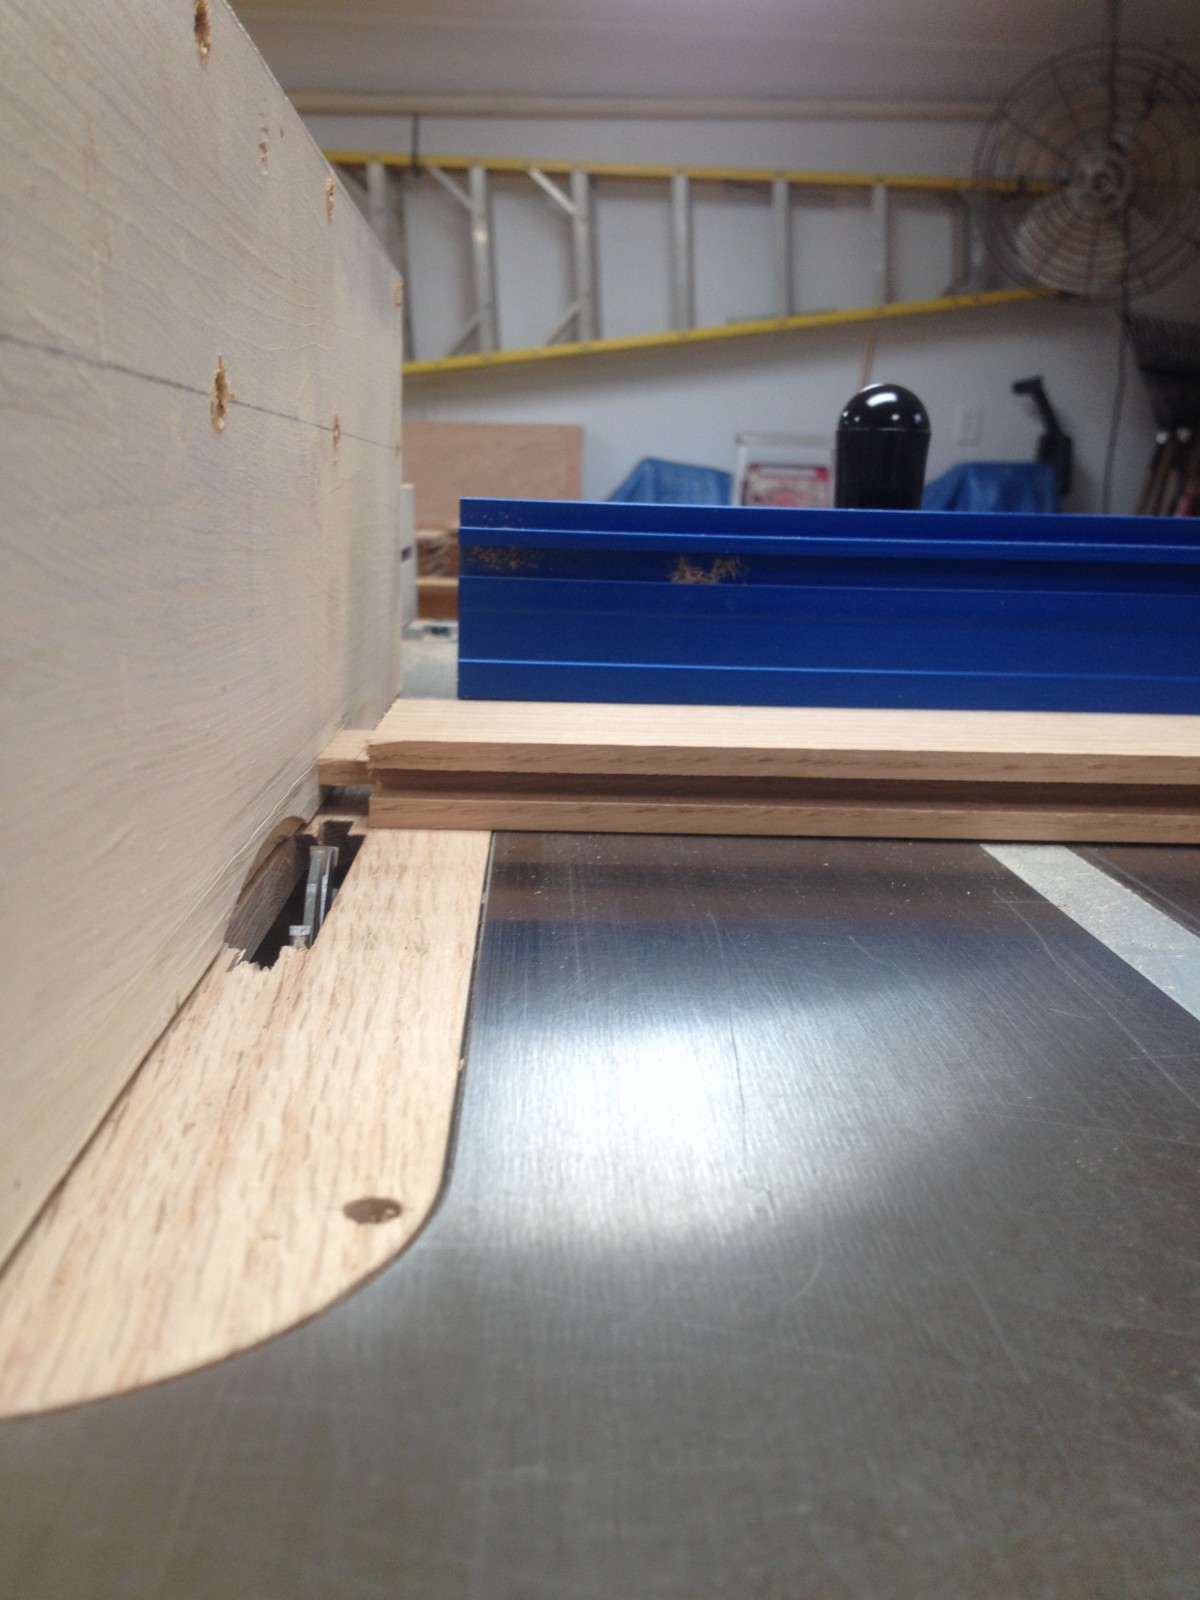
Cutting the tenons in the ends of the rails.
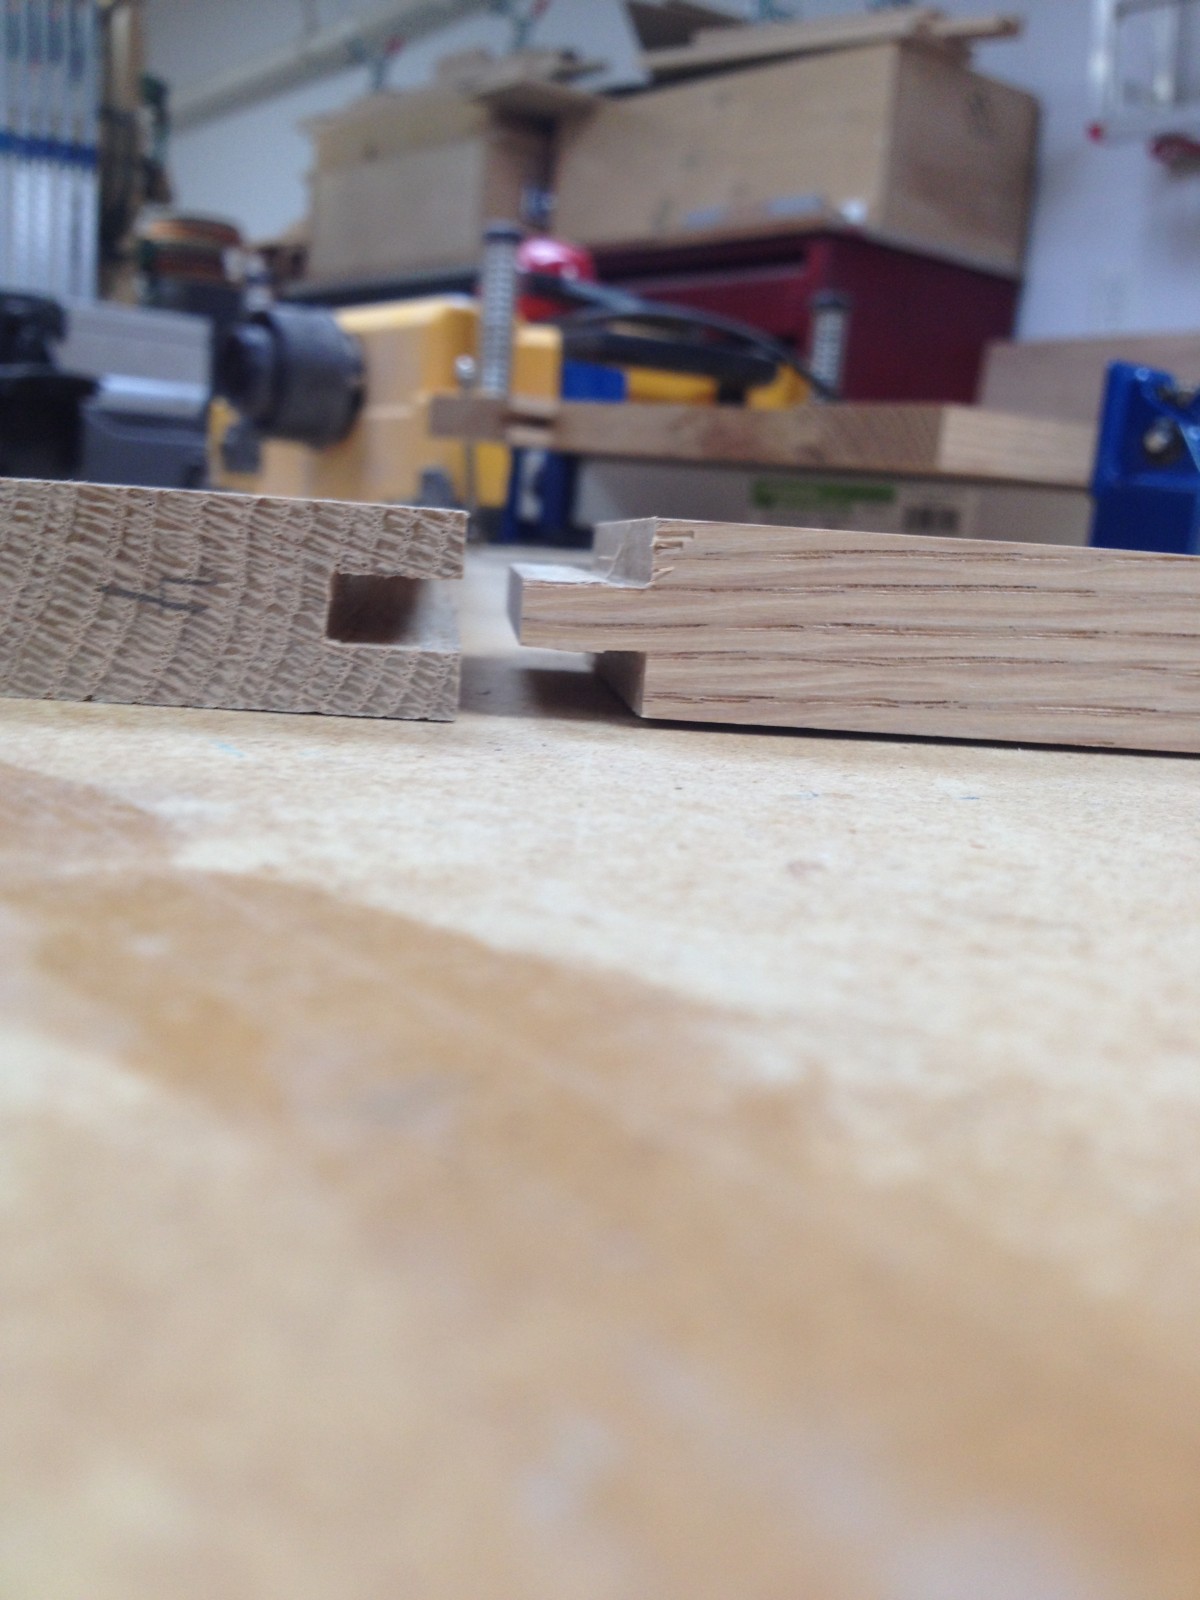
This shows how the frames fit together – stub tenon and mortise.
A perfect fit!
Tomorrow, I will fine tune all the tenons and begin gluing up the side and back assemblies.
Be the first to comment on "Rolltop Desk Build Part 2"