
Project Details
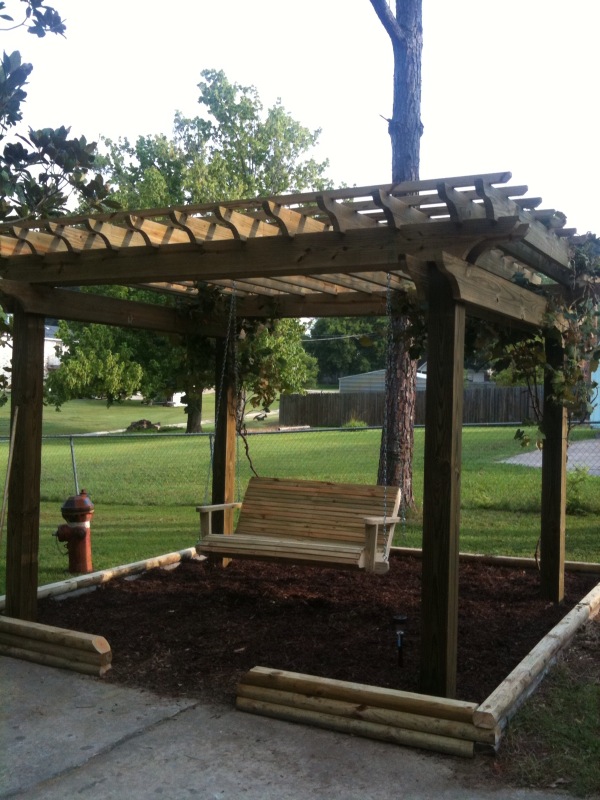 A pergola is an amazingly simple project that you can build yourself in a weekend! And, at about 1/3 the cost of a pre-fab or kit. Follow these simple steps and you’ll have a great place to relax with your sweetie!
All lumber is pressure treated and will be wet when you buy it. Get your materials one week before you plan to build the project and allow the wood to dry outside.
Only basic tools are needed: Skillsaw, miter saw, drill, jigsaw.
For a 10 x 12 (outside measurements) pergola, you’ll need the following materials from Lowe’s:
4 – 6 x 6 x 8 (corner posts)
4 – 2 x 8 x 10 (lower side cross beams)
4 – 2 x 8 x 12 (lower front and back cross beams)
13 – 2 x 6 x 10 (top cross beams)
6 – 2 x 4 x 12 (top level strips)
5 lb. – 2 1/2″ Coated Deck/Patio screws
5 lb. – 3 1/2″ Coated Deck/Patio screws
Set of 4 – Ground auger anchor kit
4 – 1/2″ x 5″ Galvanized Lag screws and washers
Introduction
I built my pergola to have a “beefy” look, so I decided to spend just a tad extra to get bigger posts and main crossbeams.
I set my posts on small patio blocks and anchored them via a ground auger system. If you’re placing your posts on concrete, you need a different anchor system.
Step 1 – Lay out your area
The most critical step is to layout your four corner posts. Once this is correctly laid out, the rest is a piece of cake!
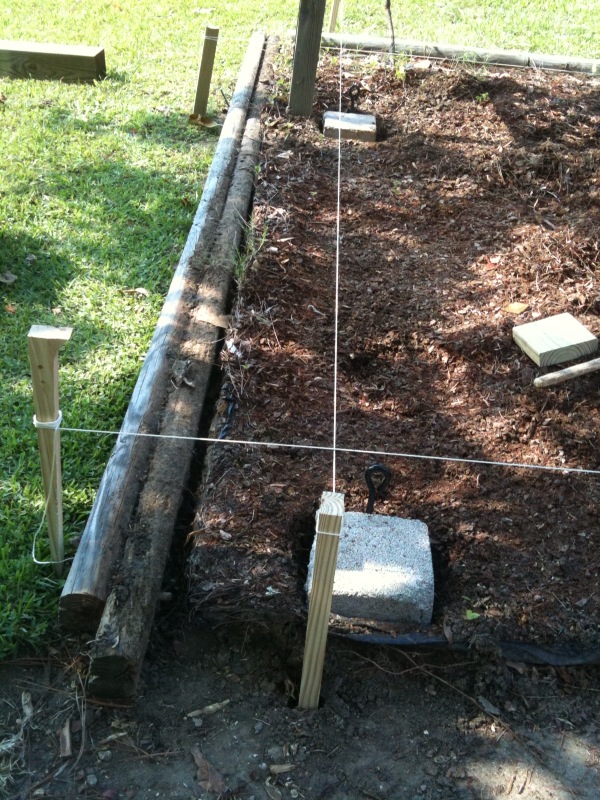 Using string, lay out where the corners of your posts will be. For a 10 x 12′ pergola, the outside corner of the posts are 8 x 10′ apart. Check to make sure each post layout is square and exactly 8 and 10 feet apart.
One way to make sure everything is “square” is to take diagonal (opposite corners) measurements with your tape measure. If you have any difference, make adjustments until they are the same.
Set small blocks for the posts to sit on and use a level to insure each block was level with the other three.
Then, carefully remove the blocks long enough to install a 30″ screw auger anchor to line up with the back of each post and lay out your corner posts
Step 2 – Prepare ends of crossbeams
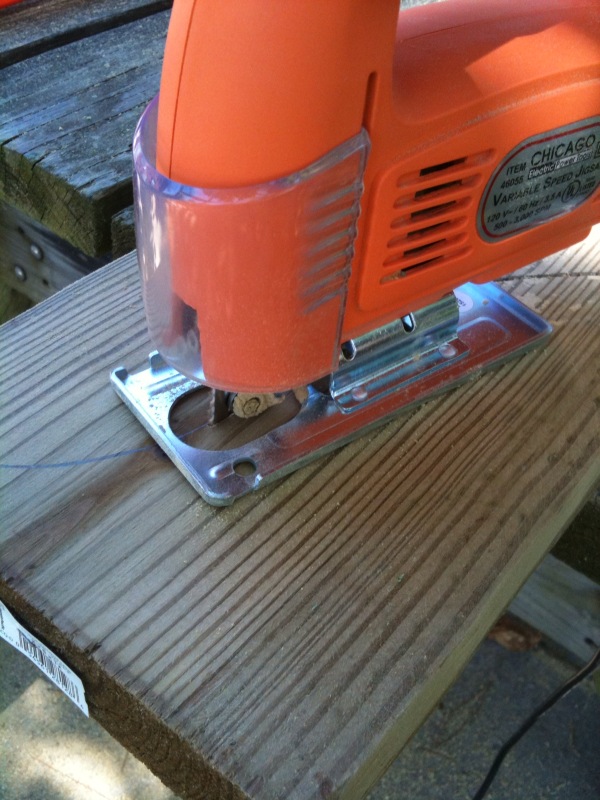 Once your area is laid out, begin building two side frames. Choosing a design for your beam ends, make a cardboard or plywood template and transfer the design to the ends of the four 2 x 8 x 10 boards with a pencil. Use a jigsaw to cut the design.
Note one: Since the boards are not exact length, you will need to measure and cut them to exactly 10 feet in length.
Note two: Your design must not exceed 12″ from the ends of the board.
Step 3 – Build the side frames
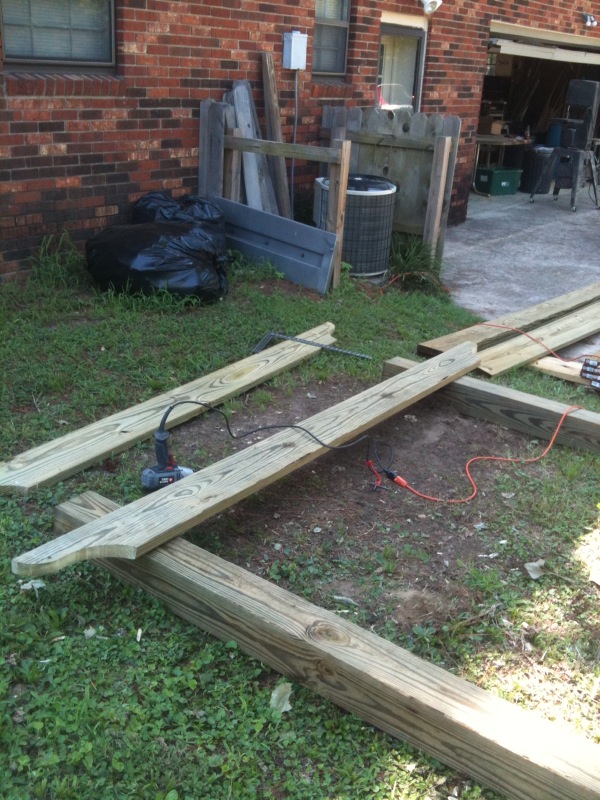 Lay the corner posts on a flat surface, with the outside edges exactly 8′ apart. Lay the top of one crossbeam 6″ from the top of the posts and screw the beam to the post with 3 1/2″ screws. Make sure your beam and post are exactly 90 degrees from each other. Then flip the assembly over and attach the second crossbeam the same way
Note three: Do not skimp on the screws! I used eight screws on each beam attachment.
Note four: If you have done this correctly, you will have 12″ of beam hanging over the outside of each post.
Step 4 – Frame the sides together
A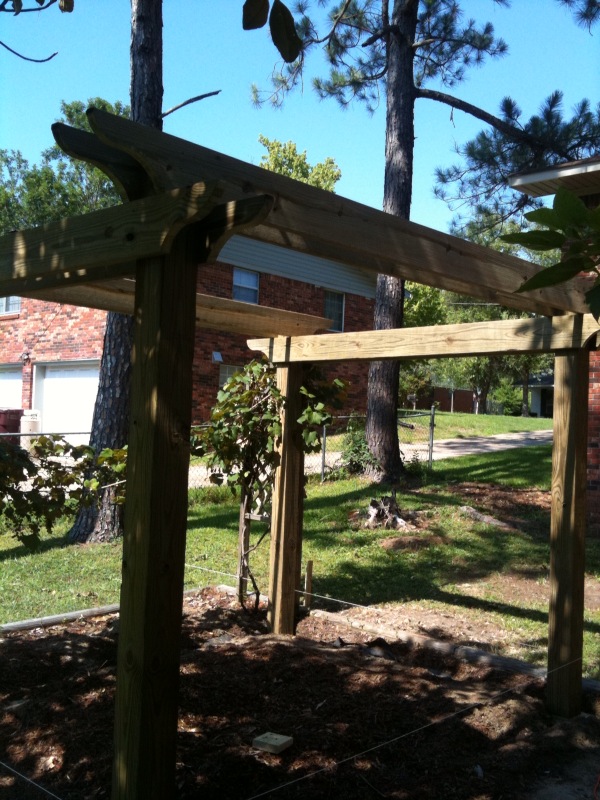 fter the sides are complete, you are ready to put them in place and attach the front and back crossbeams, tying the assembly together.
Begin by cutting your end design on the four 2 x 8 x 12 boards. Mark a line 12″ from the end. This will be your marking place for attaching them to the side assemblies.
With helpers, lift the side frames in place. Make sure the outside edges of the posts are lined up with your layout strings. Place and attach one upper front and back beam WITH ONE SCREW ONLY (for now) above the end panel beams, using your pre-marked lines for placement.
Check to make sure the posts are plumb and the beams are level. If they are not, remove the screw, make adjustments and re-attach. Once you are satisfied that everything is square, attach the second front and back beams and permanently screw the entire assembly together.
Step 5 – On to the roof beams!
Now we start to make this thing look like a pergola!
Take time to cut your end design on the thirteen 2 x 6 x 12 boards. Because these are smaller in width, you’ll need to make a separate template for this size.
Note: Again, measure and cut your boards to 12′ long, as they are usually a little longer than 12′.
Begin by marking the position of the 2 x 6 roof beams on top of the front and back cross beams. If your a novice, this may get a little tricky, so go slow.
Starting at the center of the front and back cross beams, make a pencil mark 3/4″ on either side of the very center to allow for the 1 1/2″ width of the 2 x 6. This means the 2 x 6 will fit in between the two marks and will be centered on the crossbeam.
Then, make the same marks in exactly 12″ increments to each end of the cross beams. This will give you exactly 12″ “centers” and keep the roof beams at an equal distance apart throughout.
Step 6 – Prepare and attach the roof beams
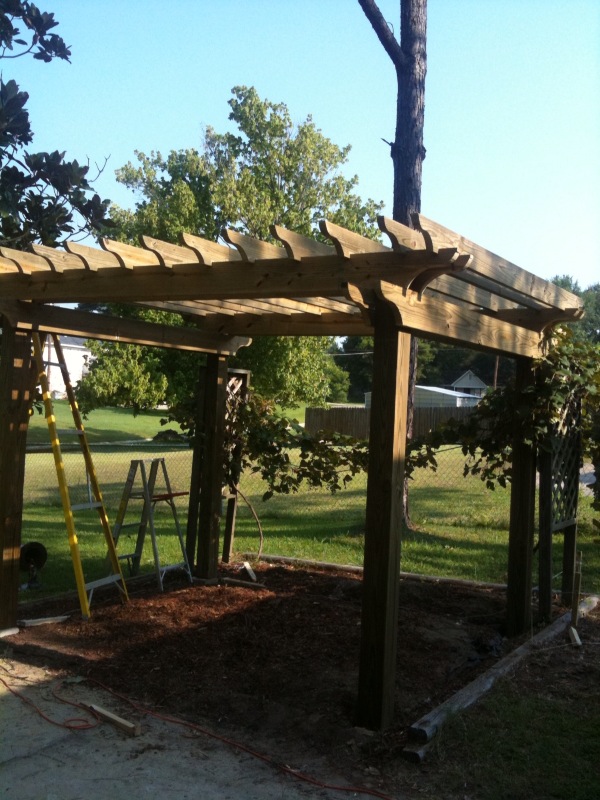 Before attaching the roof beams, you will need to cut one inch deep notches in each 2 x 6, so it will interlock with the crossbeams. Do this by placing a 2 x 6 in place (with 12″ hanging off the front and back crossbeams) and mark where the notches need to be cut.
Using a skill saw or jig saw, cut each notch one inch deep and 1 1/2″ wide (see close up of picture).
NOTE: If you are confident the frame is square, you can clamp a few of the boards together and cut several notches at once. Otherwise, you will want to mark each board individually.
Once the notches are cut, put the roof beam in place and screw it to the crossbeams using the 2 1/2″ screws. Again, don’t scrimp on the screws! Use em!
To give the project a detail, I put an extra top beam six inches from each side.
Step 7 – Finally, the last tier!
The final pieces to install are the smaller “toppers.” These give the project an extra flair, and keep the roof beams from bowing or warping over time.
Begin by ripping the six 2 x 4 x 12 boards in half. This is easily done on a table saw, but a skill saw will work as well.
After ripping the boards, cut a short 45 degree angle on the end of each one, for a detailed look (see photo below).
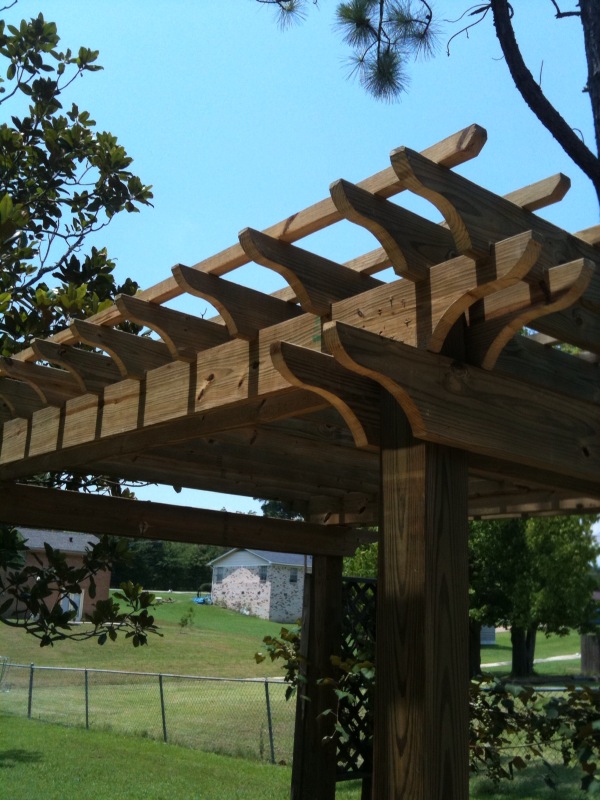 It is recommended that you pre-drill holes for attaching them to the roof beams. If you don’t pre-drill for the screws, you might split your topper.
Place the toppers on 12″ centers, just as you did with the roof beams using 2 1/2″ screws.
Step 8 – Anchor the posts
Sorry, no picture here. Simply use your Lag screws and washers to connect the screw anchors to the posts. Pre-drilling for your lag screws will make the job quick and easy.
Closing
Although Pergolas look difficult, the number of pieces needed to make one are relatively few. But the rewards are great.
I will be happy to answer any questions. You can email them to me at randy@sawdustinn.com.
Happy building!
“A man who honors his wife will have children who honor their father.”
Thank you for this tutorial ! Printed it as a whole, I`ll use it to build my own pergolas, will come back at the end of the summer with the results.