Finishing our Grandfather Clock project took a little longer than I had hoped. I didn’t want to rush the most important stage of the process, finishing. There were a couple of other delays as well.
Let’s see that again?
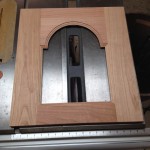
Because I’m not immune to making mistakes along the way, there was one element of the project that had to be completely remade – the Dial Trim Panel. It’s the decorative frame that wraps around the edges of the clock face and the moon dial.
When I cut the parts for the Dial Trim Panel, I must have failed to pay attention to the measurements for the bottom rail. Instead of making it 2″ wide, I cut it 3-1/4″ wide. This meant the inside of the frame was too small for the clock face. The lesson I learned here was to check the fit before I go to through the finishing process. It was disappointing to learn the error after spending the additional hours on sanding and finishing.
Because of the special way these pieces fit together, there was no way to “repair” the mistake. The part had to be completely remade, which delayed finishing the project by a week. I decided to take my lemons and make lemonade. So…for your viewing enjoyment, I made a Sawdust Inn video showing the steps required to make the panel!
The back panels
Another slight delay was indecision. The materials list calls for the back panels to be made from 1/2″ plywood. In the south, cherry plywood must be considered an exotic wood, it’s just not available. I’d have to order a full 4′ x’8′ sheet, but only needed about half of that for the project. At $100 a pop, plus that much more for shipping, it just wasn’t economical.
After pacing the floor like an expectant father for two weeks, I finally decided to use solid cherry wood and make my own panels by gluing up a couple of 6″ wide boards. This brought my cost down to around $75. But this avenue comes with a catch.
Plywood is a very stable wood and can be cut to fit perfectly inside the opening allotted for it. Solid wood, on the other hand, requires special considerations. By nature, it expands and contracts with seasonal changes in temperature and humidity. If the wood doesn’t have room to move, it will eventually cause something to break. If you’ve ever noticed cracks in old furniture or wondered why wood floors sometimes buckle, it’s most likely because the wood contracted or expanded, but had no room for movement built in.
Here’s an very informative article on the movement of wood – The Shrinking and Swelling of Wood and Its Effect on Furniture.
The solution for our clock was simple. I cut the solid wood panel 1/4″ narrower than the opening to allow it to expand and contract. I then cut horizontal elongated slots for the panhead screws that hold it in place. As the wood “moves,” it will have unrestricted freedom. Here’s a short Sawdust Inn video showing my process.
The finishing process
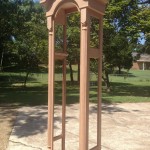
In my last blog, I shared that rather than staining the project, I wanted the wood to have the naturally dark cherry color that occurs over the span of a few decades. I began by sanding all the parts with finer courses of sandpaper, finishing with a hand-sanding to 220 grit paper. Then, as planned, I helped the aging process by exposing it to the UV rays of direct sunlight. With the help of two sunny days, the cherry was noticeably darker. Adding a generous coat of Boiled Linseed Oil helped move it towards a rich golden brown.
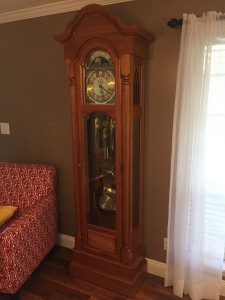
I finished it off with three coats of polyurethane for long-lasting protection. As nature takes it course, the clock will eventually reach a rich, deep crimson red.
The movement
After moving the bare case to its showcase spot in the living room, I added the beveled glass and the small raised panel inserts to the sides of the clock. I also added the glass to the arched door and pre-drilled screw holes for the hinges.
 A few weeks ago, I had assembled the movement components of the clock (dial, gears, chimes and weights) onto a temporary mounting stand. It’s part of a revolutionary patent pending mounting system invented by the designers at Klockit. This system allowed me to easily assemble the movement and calibrate the chimes all while still outside the clock case. Once I completed setup and calibration, I let it run as an inspiration to me.
The best part about this system is it allowed me to install the entire movement module into the clock case in a matter of minutes! Once the movement was installed, I attached the back panels and the beautiful arched door.
A special thanks goes to Klockit! Klockit supplied the plans and movement for this dream project. Throughout the build, Klockit’s amazing staff were readily available to answer any questions I had regarding the plans. I’m grateful to Klockit for helping me build this Columbia Grandfather Clock!
And now, here is a look at the finished product…
Happy Woodworking!
Randy
Click any image for a full-size view.
- Grandfather Clock
Want to follow along to see how I built this clock? I’ve written a blog series, giving you a bird’s eye view of the process. Start here with part 1.
 Disclosure: Klockit has provided me with a copy of the Columbia clock plan and components in exchange for providing a blog series of the build. I received the products at a discounted price and am under no obligation to return them.


Randy, you are a true craftsman on the order of our forefathers. The clock is beautiful! I can’t wait to see the video of your work.
Thanks for the kind words Durick!
Randy, you are a credit to the woodworking craft.
Well done. Now you can bring it to the next Gumtree meeting. Yeah! Right! My humor for the day.
Bill
Thank you, Mr. Bill! It’s a joy to be a part of the club! (I get to make great friends like you!)
Amazing work.
Randy,
I am making the Columbia clock using African Mahogany. The build has been a real challenge for me, and I could not have done it without your very helpful videos …especially making the fluted columns with a router. Your work is beautiful, and I thank you for all of the helpful hints on the machining processes.