
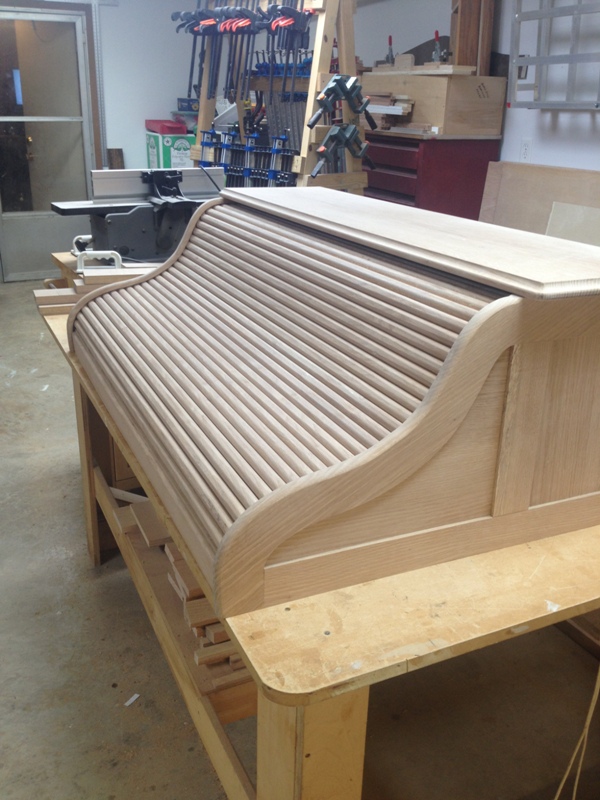
 The tambour is complete!
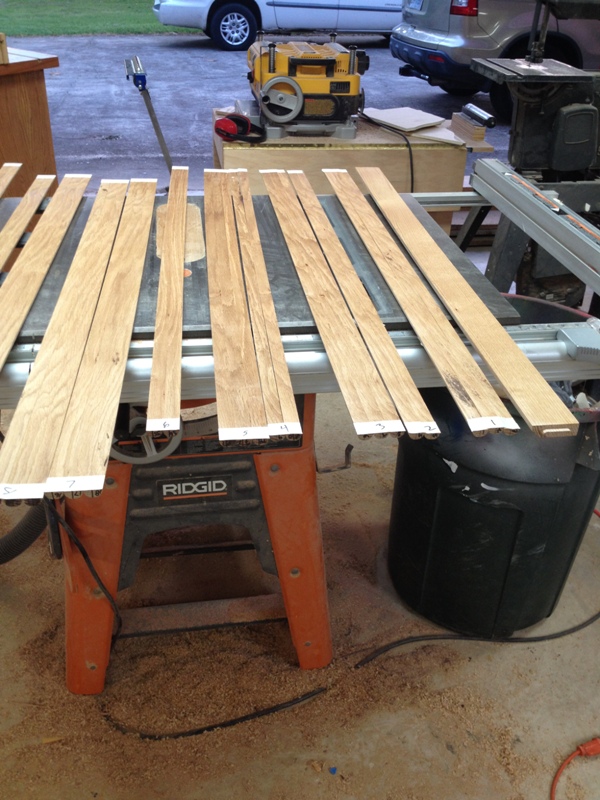
After cutting the 29 individual slats necessary for a flexible tambour that would ride in the curved side slots, I began by building a jig to make sure they would align with each other evenly. If any of the slats are crooked, the tambour will not ride squarely and will “pinch” in the groove.
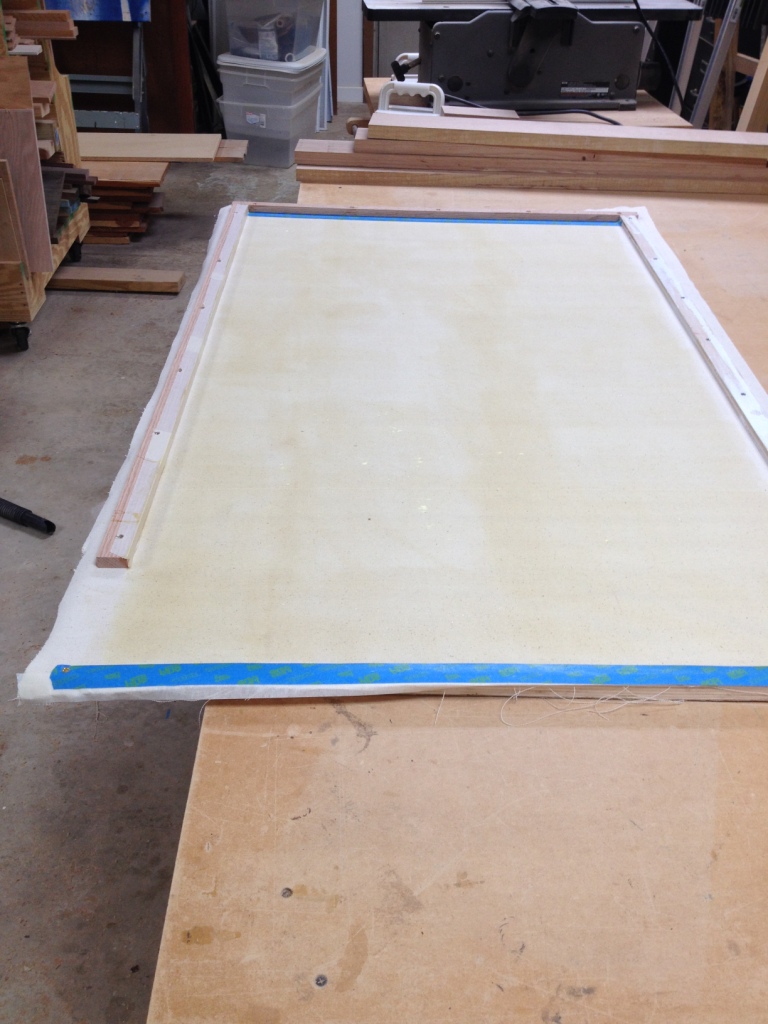 The jig (at right) is a piece of plywood with a base rail and a side rail to give me the perfect 90 degree angle I need. I stretched an over-sized piece of canvas over the plywood and secured it under the rails with screws.
I taped the slats together in groups of two and three each, keeping them in the same order as they were cut from the wide boards.
 The canvas and the backs of the slats received four coats of contact cement. I used a small paint roller to apply the cement.
After letting the cement dry until it was slightly tacky, I began applying the taped-up groups of slats to the canvas one at a time. Between each group, I used a J-roller to apply pressure to the slats for a solid bond.
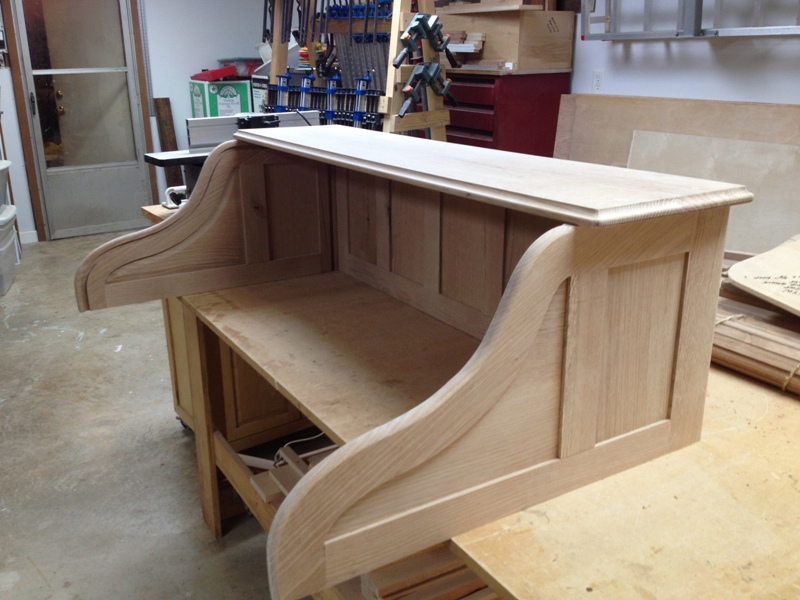
At right, you can see the completed tambour in position. The tambour fits snuggly, but runs in the groove nicely.
Once the finish is applied, a good dose of paste wax in the groove and on the edge of the tambour will insure the tambour slides smoothly and easily.
The next step in the process will be a doozie…making the cubby hole assembly. Lots and lots of fun work ahead!
Read Part 9 here.
Be the first to comment on "Rolltop Desk Build Part 8"