
This week, we have embarked on the biggest project in the history of Sawdust Inn – a complete kitchen and dining room remodel for Mrs. Sawdust Inn. But unlike television, we won’t be able to finish our remodel in 60 minutes, so you can follow along as we give you a detailed insider look of the things you won’t see on HGTV.
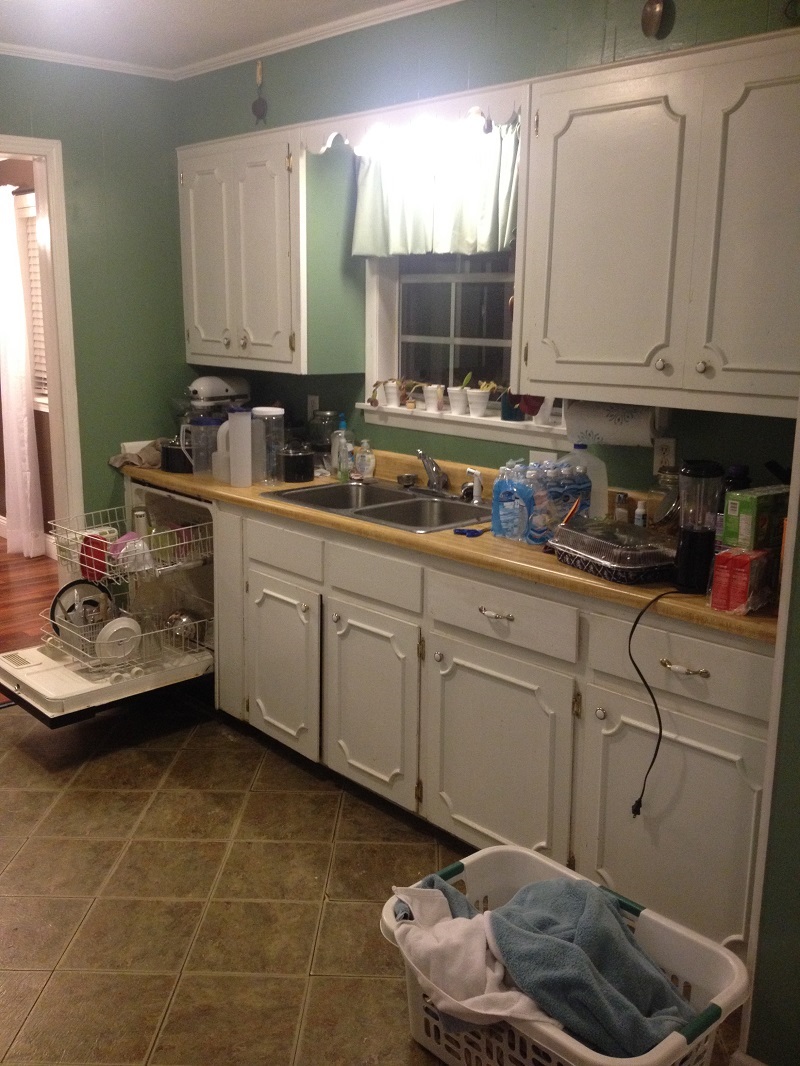
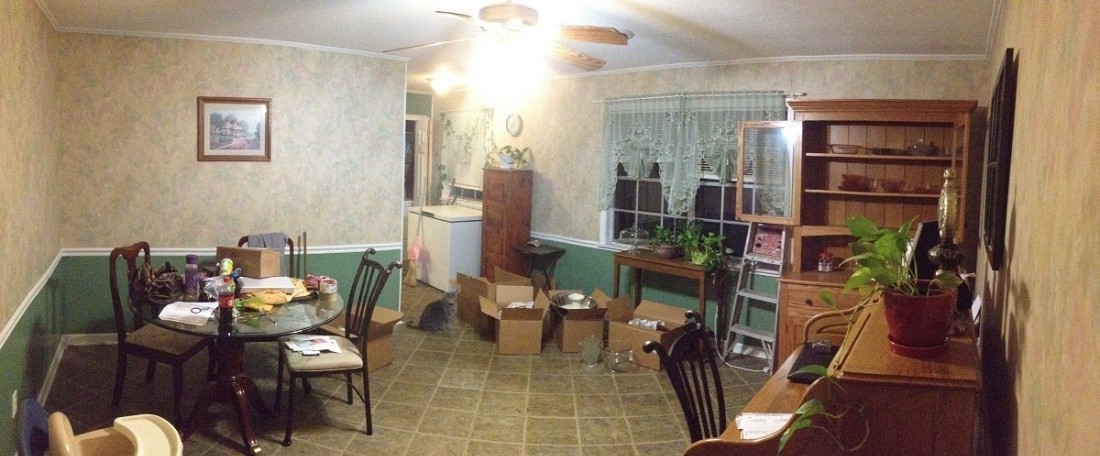
This project is the final phase of a complete remodel of the entire house. Built in the early 1970’s, the kitchen has the original design – a galley kitchen with a wall separating it from the dining room. When built, the walls were covered with brown wood paneling and vinyl flooring. The cabinets were built on-site, something that was common for the time period.
I made a very short and rough walk-through video of the area just prior to the beginning of demolition. Your amiable woodworking blogger forgot to turn the camera to the correct angle, so view at your own risk!
We will break the project down into a few major components:
- Demolition of walls, floors, cabinets and everything else we can get our hammers on.
- Repairs to floor areas damaged by water leaks over the past 40 years.
- The addition of a laundry room with space for an upright freezer.
- Replace old single-pane aluminum windows with energy efficient double-pane vinyl windows.
- New drywall, tile floors, electrical, plumbing, appliances, and custom cabinets and lighting.
The project was to begin on January 1, but we were able to get an early head-start during Thanksgiving week. Hopefully, we will be able to finish this project in 2-3 months.
Here are views from the kitchen and dining room just before the actual tear-out began, but note that Mrs. Sawdust Inn was beginning to pack and move items around:

-

- Before
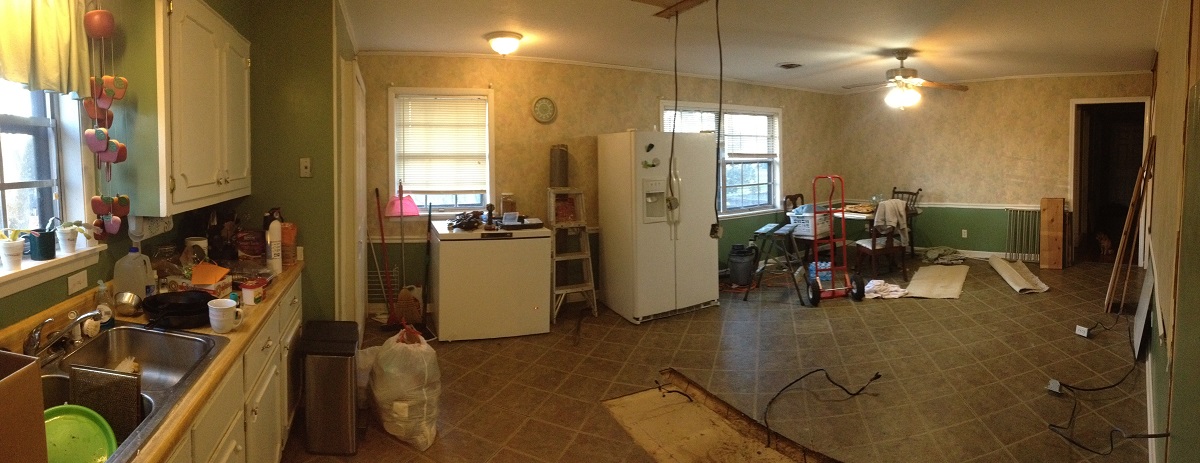
After the first four days of work…
We didn’t take a sledgehammer and start smashing walls and counters like they do on television. A simple hammer and crowbar is all you need to do most of the job. It’s slow work, but keep in mind, most people still live in a house during the process. There’s no use in dusting up the entire house and it really doesn’t save a lot of time to just start knocking things down with abandonment.
This picture shows the view of both rooms with only the hot wall removed. When compared to the two photos above, you can see it really opened up a lot of space!
The oven, stove and microwave were picked up by a “collector” who drives around looking for such things left on the curb. The wall studs will be re-used on the laundry closet. The cabinet pine boards will be made into kid’s toys. The plywood and paneling was discarded.
Below shows the area with three layers of flooring, the kitchen cabinets and the paneling removed on the two inside walls. Because two of the walls are outside walls, we’re going to cover them with 3/8″ thick sheet-rock so we don’t have to mess with the insulation behind the paneling. The other walls will have the standard 1/2″ sheet-rock thickness.
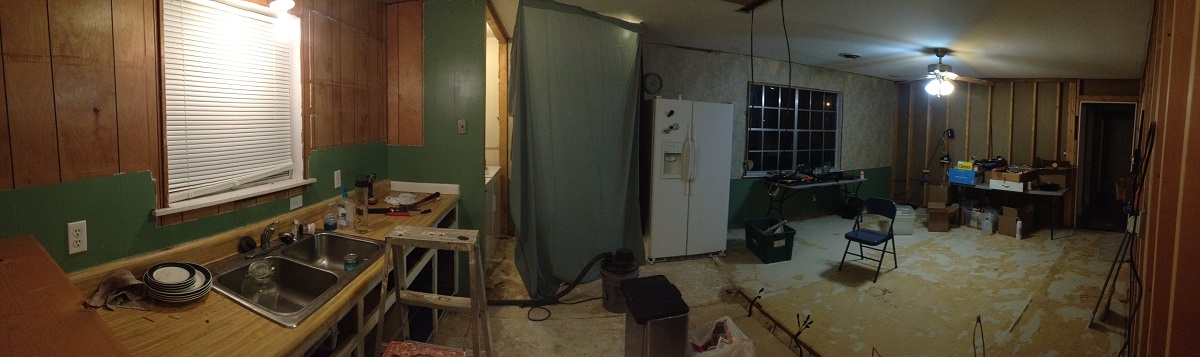
The sheet next to the refrigerator is set up as a template for the angled laundry closet. We wanted to make sure it didn’t take up too much space.
The next step is to remove the wet wall (sink, dishwasher and laundry appliances) and replace all of the plumbing. It is going to be a job removing the old cast iron drain pipes and replacing them with shiny new…PVC! I’ve built a temporary stand just for the sink, so that during a lot of the remodel, we will have access to running water for cleaning a few dishes. But for the most part, we are going to rely on styrofoam, paper and plastic to eat from.
Till the next blog update, happy woodworking!
Well, Randy, I admire your ability to tackle such a project, and your stick ability to see it to fruition. I also admire your dear wife’s patience thru it all, and during .christmas season too!!
May the Lord grant both of you the desires of your hearts during this giving season.
Praying for safety thru the construction zone.
Maxine
Thank you for the very kind comments, Sister Maxine! We are very blessed indeed!