
One distinction that makes the grandfather clock highly admired is the bonnet and crown, the elegant curved piece at the top. There are many different styles and designs, but all capture attention to their detail and complexity.
Our Columbia Grandfather Clock is no different. The Sawdust Inn spent 12 hours on the intricacies of creating the bonnet and crown. Each milling action in making the crown was carefully measured, calculated, and performed in a certain order to ensure the process went smoothly.
 The first step was to find a thick piece of cherry, something not readily available in this area. I was faced with having to glue up stock for the thickness I needed, but was concerned that glue lines might show on the final piece. Fortunately, I remembered a local woodworking friend had harvested two cherry trees a few years ago and had a handful of 8/4 (2″ thick) boards in just the right width I needed.
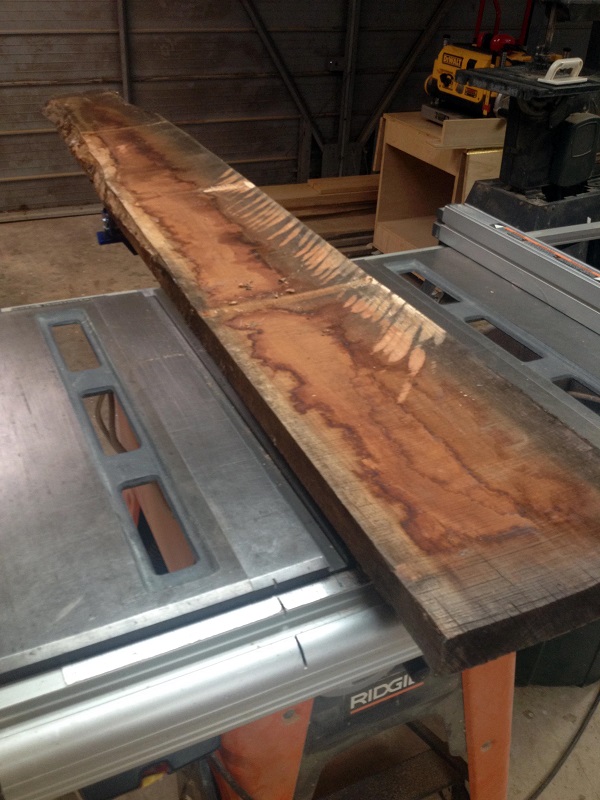
Above right, you can see the board I chose from his inventory. It was rough milled, air dried and quite weathered. A few scrapes with a roughing plane revealed a beautiful grain pattern. I ran the board through my planer for final thickness, and cut it into the three separate pieces that I would need for this element of the project.
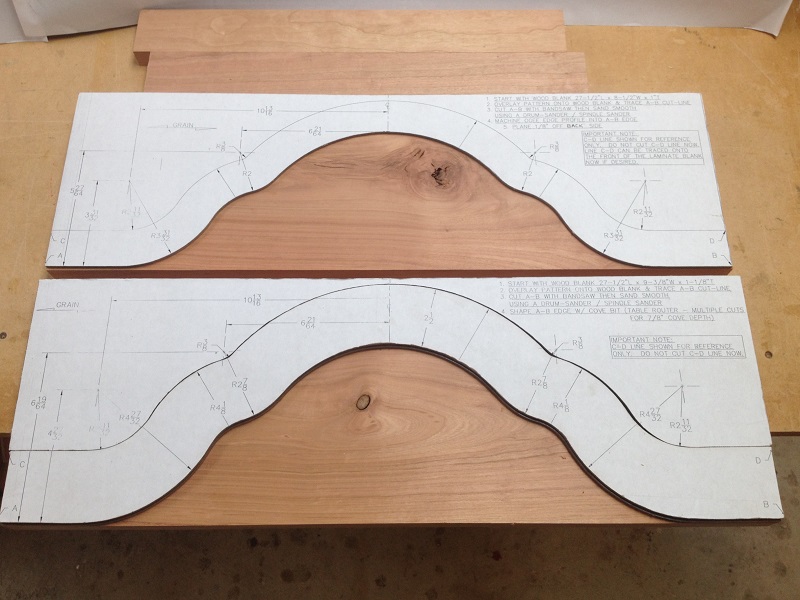
The plans called for the bottoms of two thick, wide boards to be profiled at the router table, one with a cove bit and the other with an ogee bit. To do this, I started by making hardboard templates (patterns) of the individual parts that would become the bonnet crown. I then used the templates to draw the outline on the actual cherry boards. This helped me see and avoid any knotholes and blemishes in the wood (photos of the process are below).
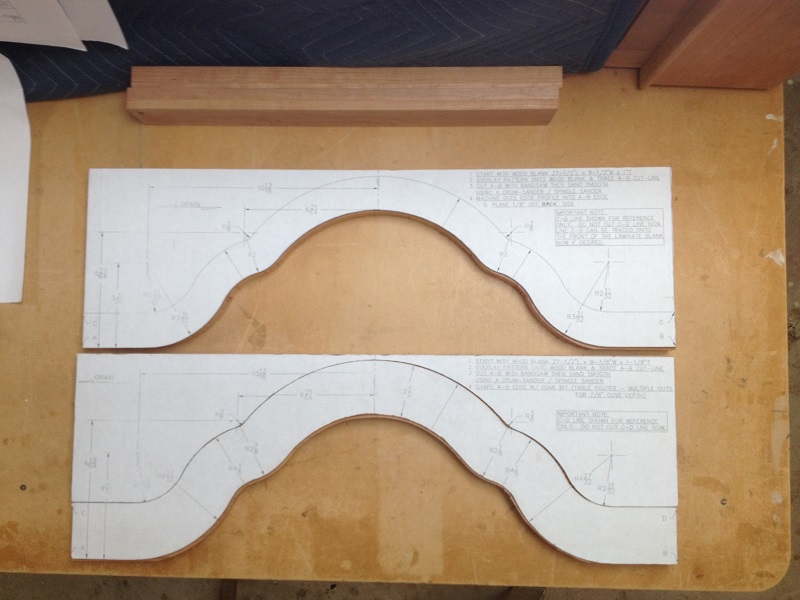
To get a perfect replica of the template, I made a rough outline cut of my cherry boards on the bandsaw, then used the template and a flush-trim bit in the router to clean up the edges.
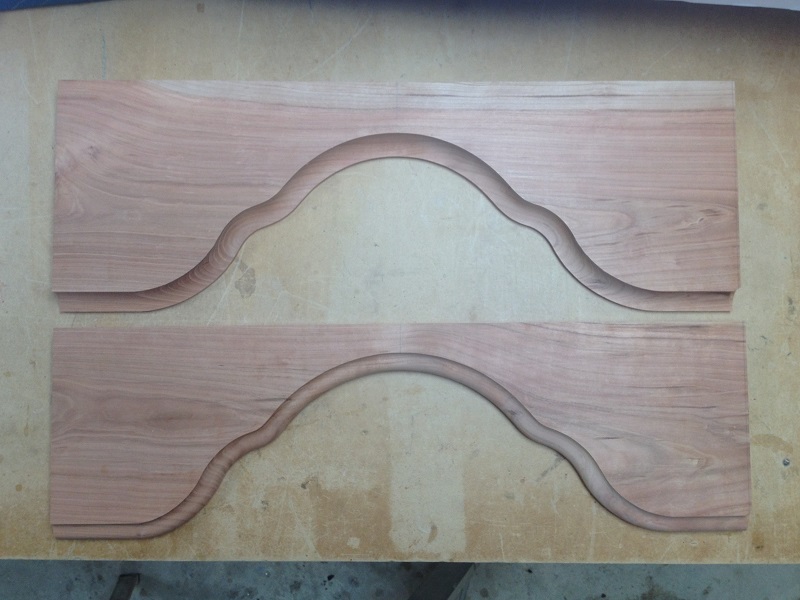
Once the bottom profiles were cut with specialty router bits, I glued the two pieces together to create a single 2″ thick blank. In addition, I glued-up two straight pieces called returns, that would become the wrap-around sides of the bonnet crown.
Click on any photo for a full-size view.
-

- Templates are strategically placed over the cherry boards to help me avoid knots.
-

- Here, the templates are shown over the cherry boards after cutting the shape.
-

- The two blanks now have the profiles routed in them.
-
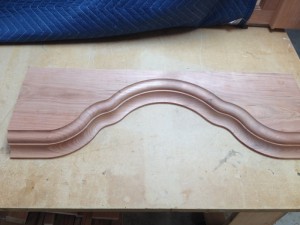
- Here are the two pieces glued together.

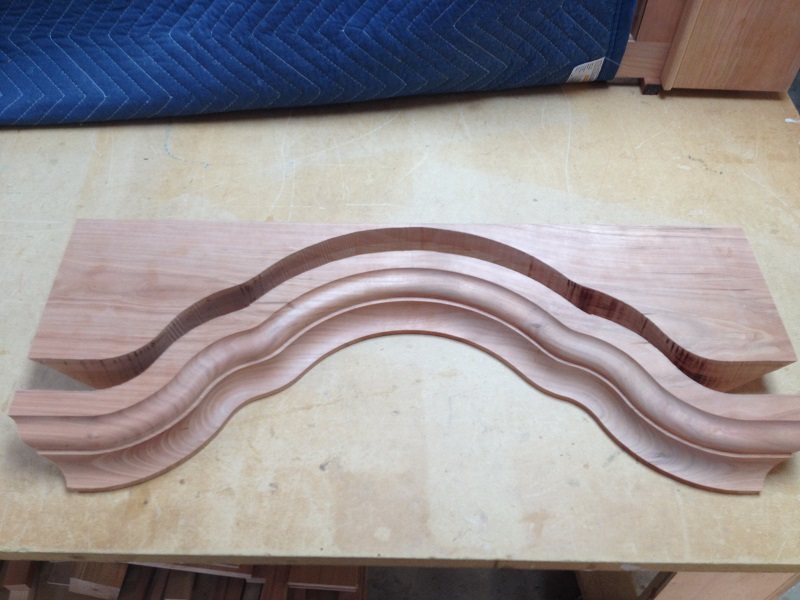
Because I don’t own a sliding compound miter saw, I needed to come up with a way to cut the miters (angles) on the ends of the large blanks so the front and side pieces would fit tightly together at the front left and right corners.
The solution came after a visit with my neighbor. Bill is a master craftsman and is my “sounding board” when I’m looking to solve a woodworking problem. In a bold series of moves, I used my tablesaw with the blade tilted to 45 degrees to make the cuts. By switching the miter gauge back and forth from one side of the blade to the other, I was able to cut the proper miters.
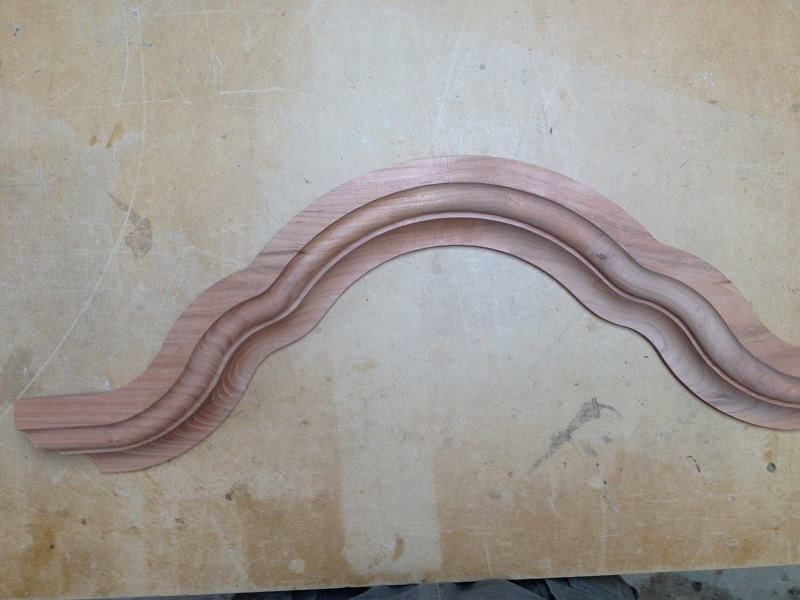
The finished crown.
The crown is removed from the blank after mitering the ends.
I did not like using this method very much. It wasn’t unsafe, but it was unnerving after putting in so much time and effort up to this point. One small goof and the entire crown would have been lost. If I do this again in the future, I already have another plan.
After completing the miters I used another template to mark the top profile of the crown on the thick blank. I cut the crown away from the blank on the bandsaw. Then, attaching the template directly to the bottom of the blank, I used a flush trim bit on the router table to finish cutting the top profile, just as I did for the bottom.
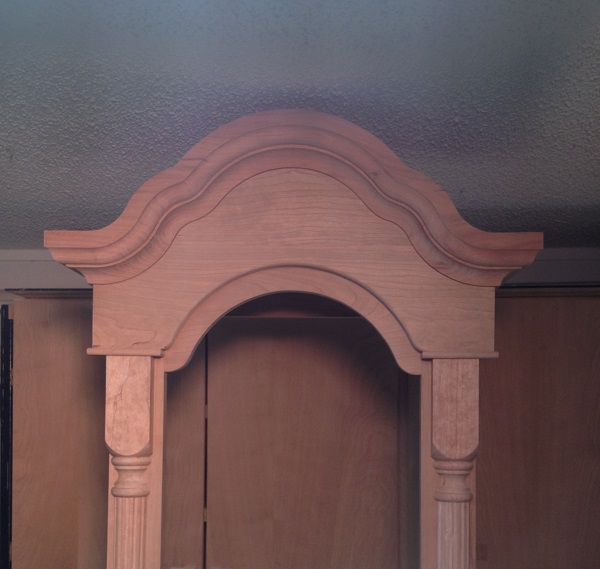
Finally, I glued and screwed the crown pieces to the bonnet frame.
It’s not unusual for me to have a small gap in my miter joints. I’m better at cutting them than I used to be, but not where I want to be. As such, I’ve learned a little trick to making those small gaps virtually disappear. Watch my video “Making small gaps in miter joints disappear” showing how I do it.
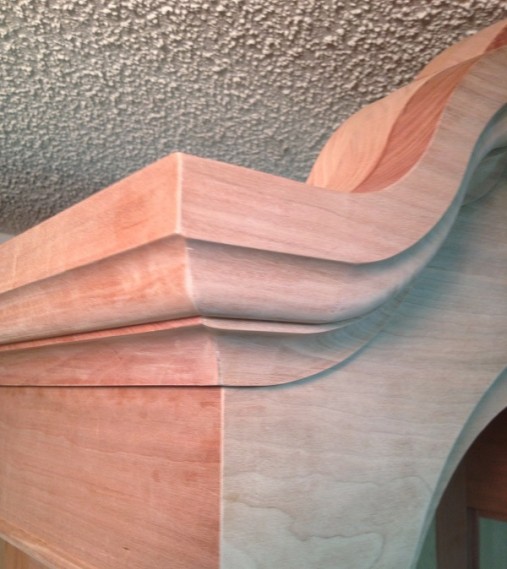
Below is a close up of the top of the clock with the crown attached and the miter joint. With the clock now standing up in the shop, I have only 1/2″ clearance to the ceiling!
-

- The finished crown!
-

- Now that’s a nice miter joint!
Overall, the project is coming along nicely. The next phase is to build the door, and a few side and back panels. We’re not in the homestretch yet, but we can see light at the end of the tunnel.
Happy Woodworking!
Randy
Read Part 4 here.
Read Part 6 here.
 Disclosure: Klockit has provided me with a copy of the Columbia clock plan and components in exchange for providing a blog series of the build. I received the products at a discounted price and am under no obligation to return them.
Be the first to comment on "Grandfather Clock Build – Part 5, the crown"