
We have completed the most labor intensive part of the kitchen remodel to date, a ceramic tile floor.
Because we have no ceiling lights yet, most of the work on the new kitchen floor was limited to only weekend daylight hours. Although we have a single floodlight in the room, it was not a viable replacement for natural sunlight coming through the large windows. As a result, it took approximately four weeks to complete the floor.
One of our first concerns about laying tile was the fact that the kitchen is a second story floor (above the garage) and subject to vibration from foot traffic, appliance motors and even a good roll of thunder during a rain storm. This could pose problems for the 1/4″ mortar joints between the tiles. Excessive vibrations might cause cracks to develop.

OSB panels replaced the particle board
Let’s add some beef
In order to alleviate any concerns with vibrations causing tile joint failure, we wanted to “beef up” the sub-floor substantially.
The first step was to remove the existing particleboard and replace it with 3/4″ oriented strand board (OSB) sub-flooring panels. There were two reasons for this move. First, particleboard swells and begins to disintegrate when subjected to moisture. Because the next step of the process included wet mortar, it would have been a disaster waiting to happen.
Secondly, particleboard is extremely dense and rigid. We needed something that would absorb vibration rather than deflect it.
OSB was a perfect solution for our application. Although is was an unplanned expenditure, we can rest easier at night knowing we did the job right.
A second support layer
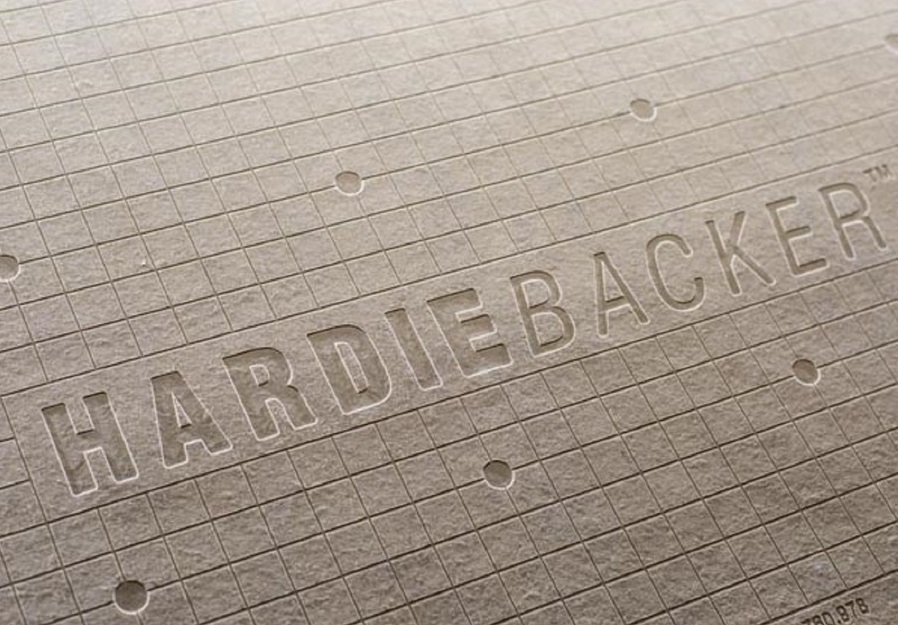 Once the OSB was down, it was time to add yet another layer of material, one designed to accept the ceramic tile. Known as HardieBacker, this 1/4″ x 3′ x 5′ panel is a fiber cement board that required us to follow specific installation instructions. Each panel had to be set in a bed of thinset mortar using a 1/4″ notched trowel.
Each panel was also secured to the OSB with 54 specialty screws, one every six inches. That means our floor required a total of 24 panels and 1,296 screws!
Once the HardieBacker panels were secured, all the joints had to be sealed with mortar and a specialty joint tape. This process was very similar to that of drywall. This created a single, continuous floor unit for laying the tiles.
The layout
Originally, we had planned to lay the 12″ square tiles parallel to the wall. Since the rectangular floor space was exactly 15′ x 24′, we were in a position that we would not have had to cut a single tile. Yes!!
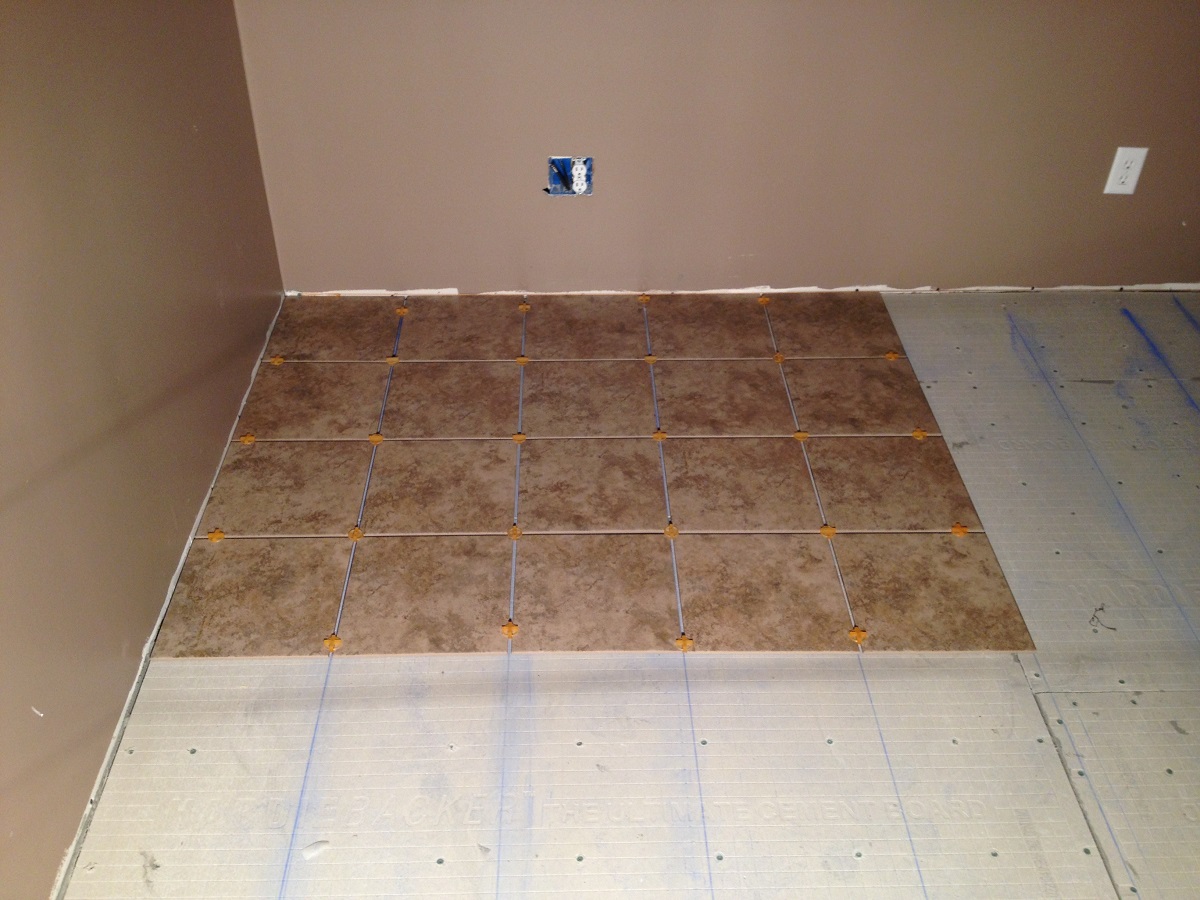
After one of our friends suggested we think about laying the tiles on an angled pattern, I made up two “samples” on the floor for Mrs. Sawdust Inn’s consideration. Here are two pictures showing the original “straight” design, then the “angled” design. Although the latter meant cutting a lot of tiles, we agreed the angled design would make the room look larger.
-

- This pattern meant no tiles would need to be cut.
-

- This pattern meant almost 1/3 of the tiles would need to be cut.

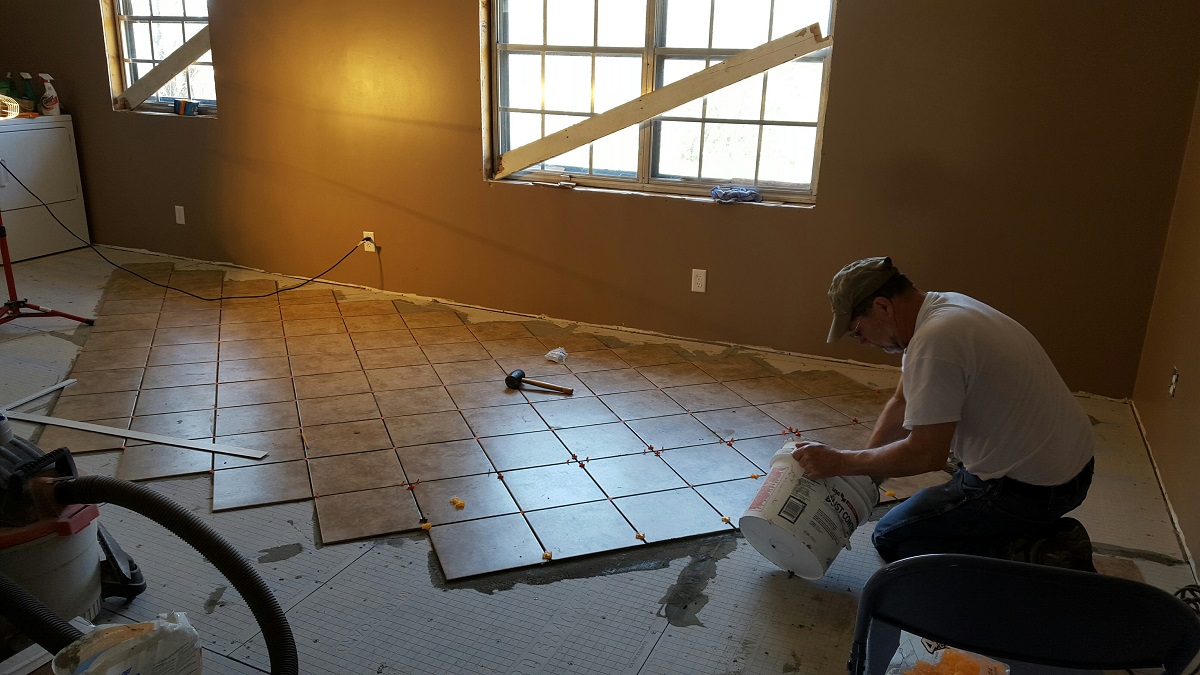
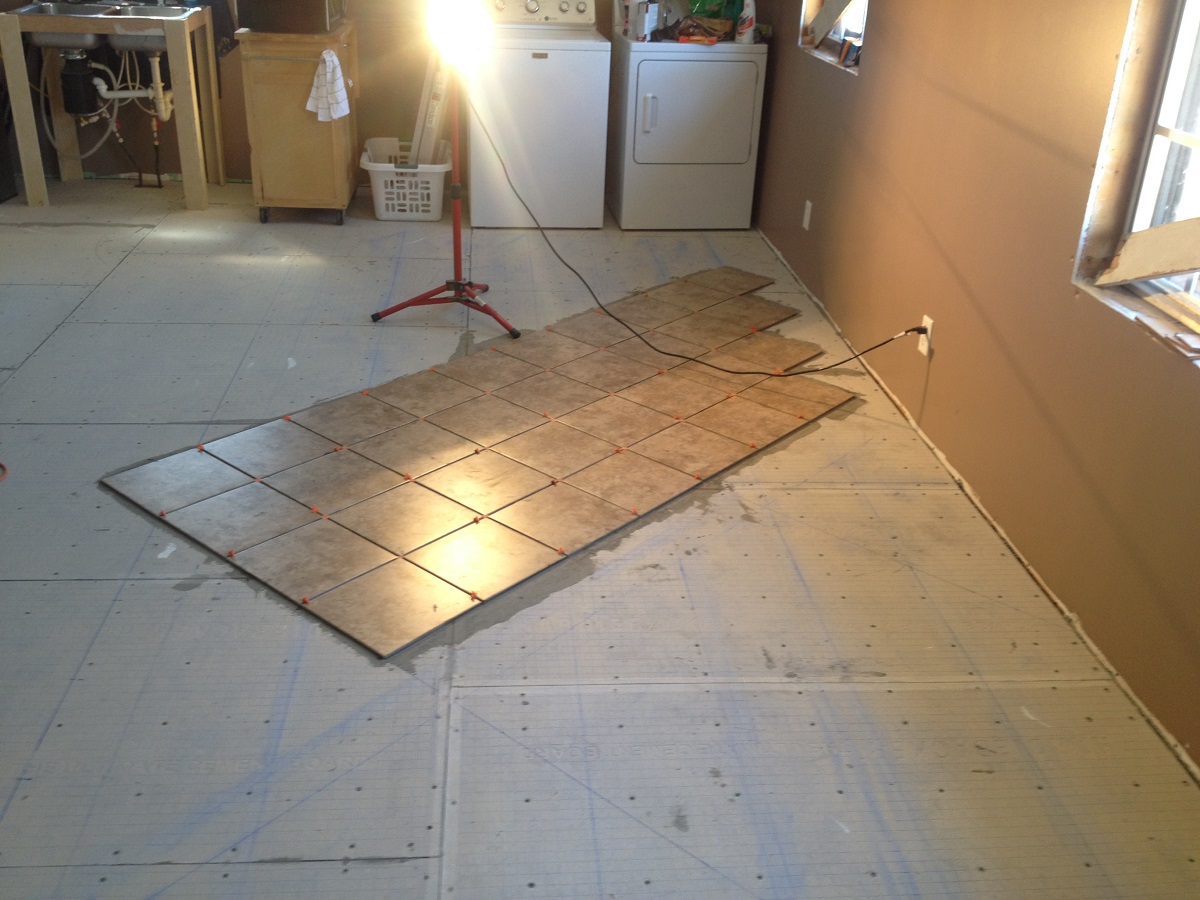
After laying out the chalk lines marking the tile placement, we began by first laying the tiles in the center of the room and working toward one corner. By doing the room in this pattern, we would be able to get a lot of the work complete before having to move the appliances from the temporary wet wall. Remember, we are trying to keep the kitchen somewhat functional with a sink, refrigerator and small appliances.
If I had a nickle for every time I’ve moved stuff from one side of the room to the other…haha.
Below are a couple of pictures taken during the tiling process. The little orange tabs are spacers to help keep the tiles in line and equally spaced apart. Click on any photo for a larger view.


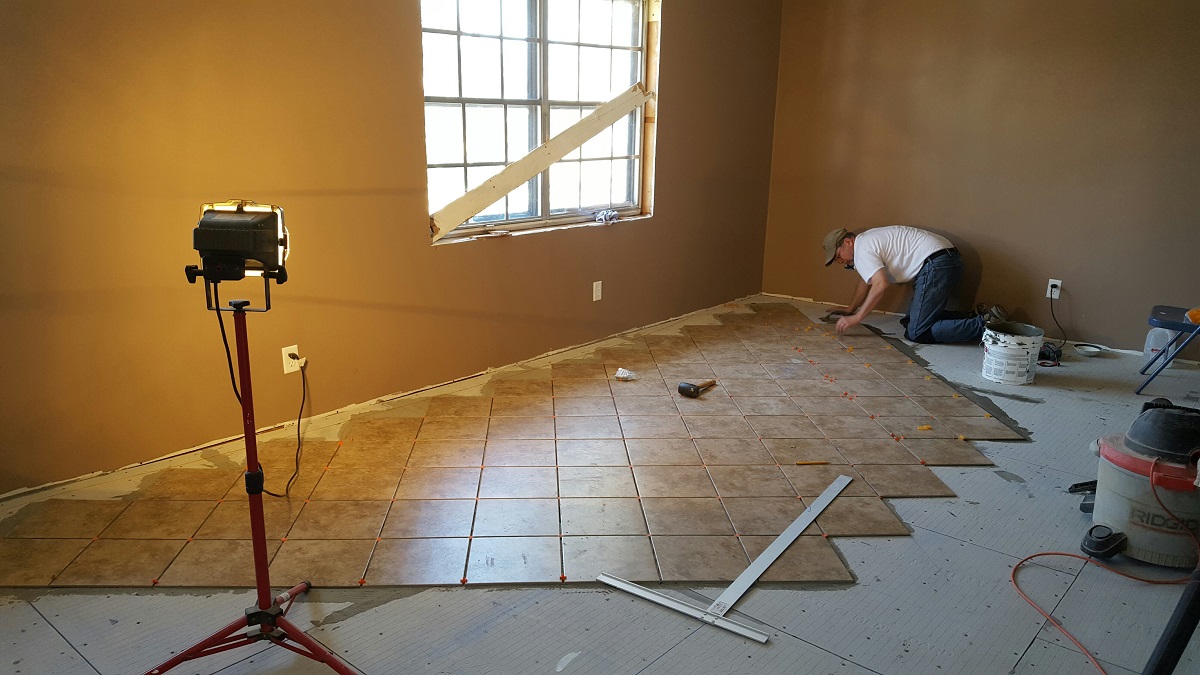
Once the main field of the floor was complete, it was time to custom cut the perimeter tiles to fit into the angled spaces against the wall. Using a wet tile saw bought when we re-modeled the bathrooms a few years ago, we were able to cut the 106 tiles without any problem. However, the angled pattern added several extra hours of work to the job.
After allowing the mortar under the tiles to set for a few days, we then began the process of grouting, or filling in the gaps between the tiles. I usually work alone, but for this job, Mrs. Sawdust Inn was an invaluable help in completing this task. Unfortunately, we didn’t take any pictures during this part of job.
But we do have some of the finished product! Pay no attention to the photo-bomber in the second photo. He thinks he’s the supervisor.
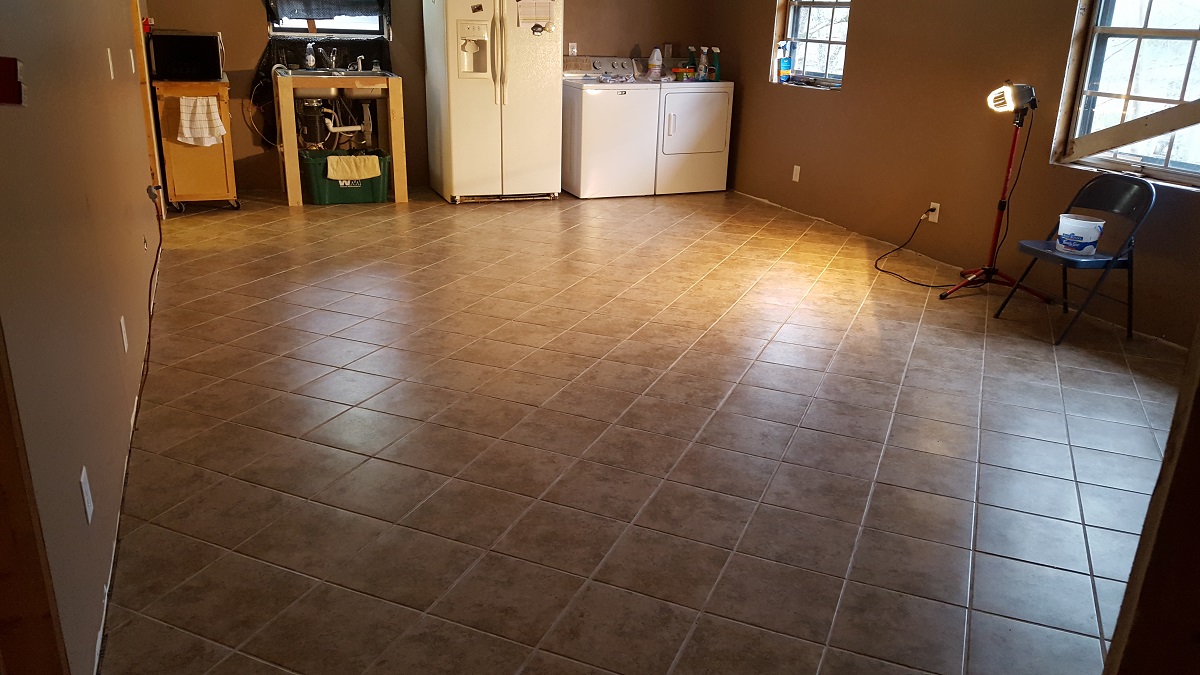

The best part about completing the floor is that we were able to move the dining room table and chairs, and a large china cabinet out of the living room and back into the kitchen area. After three months of cramped quarters, we can now move about without having to walk around a maze of furniture!
Over the next few weeks, we will complete several small tasks. Those include trimming out the doorways, making and fitting the thresholds, and getting the new windows installed and trimmed out.
The next “major” step is getting the recessed lights in place and wiring them for electricity. Then its on to cabinets!!
Thanks for reading and….Happy Woodworking!
Read Part 5 here.
Start with the first blog in the Kitchen Remodel series here.
Be the first to comment on "A new Kitchen – Part 6 – New flooring"