

The last major component of our Grandfather Clock to make is the door. Although it looks light-weight, delicate and graceful, it is strong enough to hold two heavy glass panels.
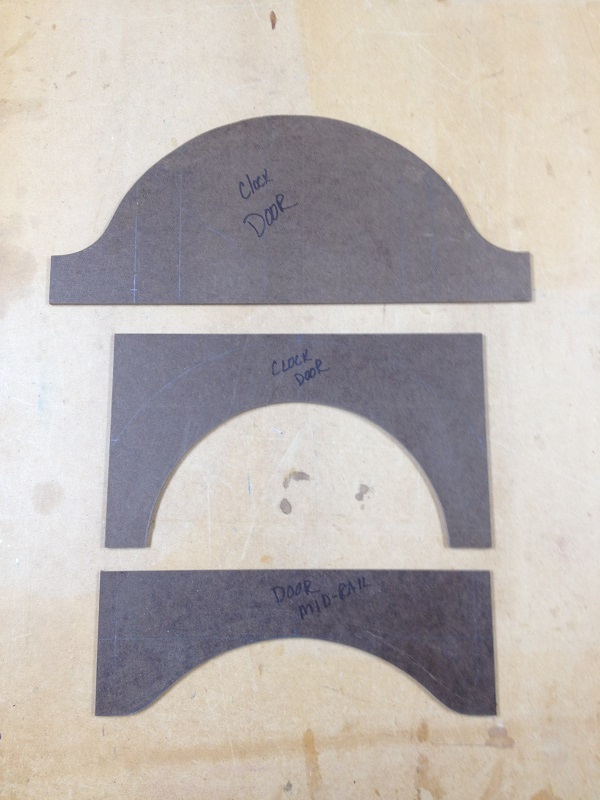
The door templates
My first step was to create a few hardboard templates of the arched pieces that make up the top and center glass dividers. Because these parts much be machined to within a 1/32″ tolerance, I wanted to create a pattern before cutting into my expensive cherry boards.
Once the templates were made, I cut and sized the six pieces that make up the door, two sides (stiles) and four cross pieces (rails). The top two rails received the arch using my templates as an outline for the shape.

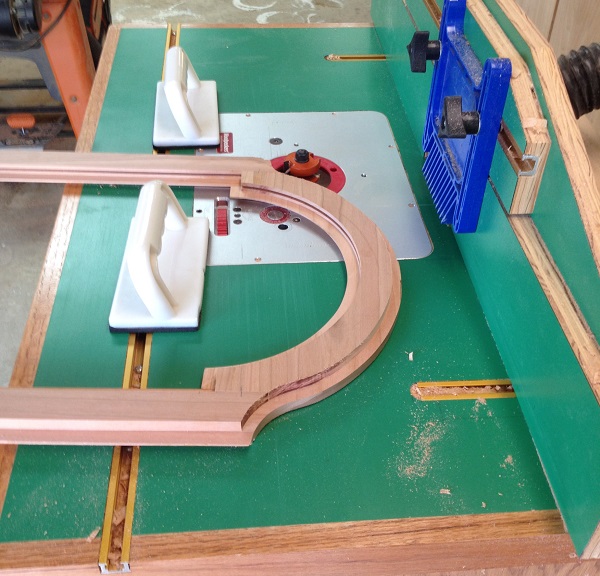
One huge router bit!
I won’t go into all the details here, but the next step was probably the most nervous for me during this project. All of the door parts needed to be milled with a decorative “ogee” profile on the face side and a “rabbit” on the back side. This would also serve as a way for all the parts to connect together. This process incorporated the use a single, rather large router bit, meaning I was removing a lot of material at one time from a board only 2″ wide…and on each side of the board nonetheless!
Go slow, go steady!
With cherry, I had two concerns to consider. First, if the bit is not rotating at the proper speed, the wood could “catch” on the edge of the bit and rip out big chunks, making the piece useless. Secondly, if the board is not fed at a consistent rate during the cut, the cherry would be left with huge burn marks from the bit.
Primarily for safety, I did several “dry runs” before I actually turned the router on, making sure my feather-board would hold the piece tight to the table and that my push blocks would clear the cutting edge of the bit as I pushed the wood though it.
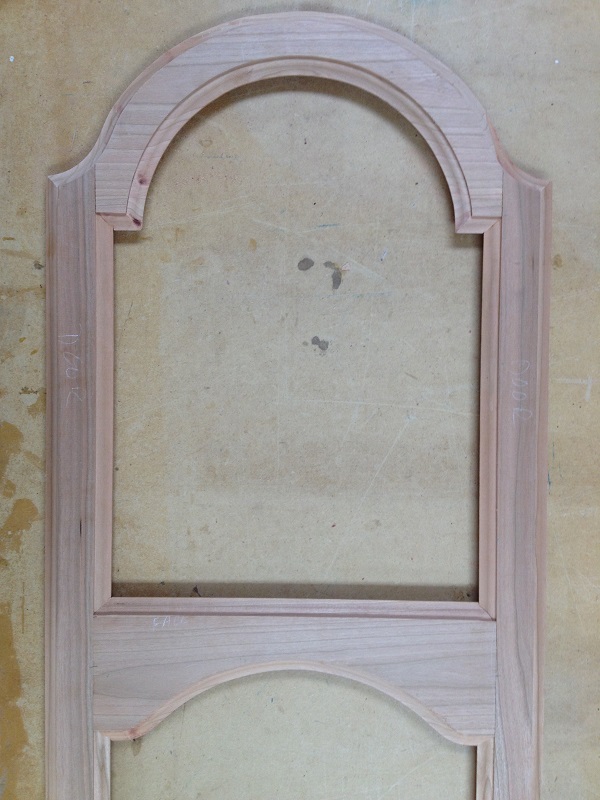
The top portion of the door. Nice!
As a result of the extra preparation, the process was uneventful and before long, I had the door frame glued and in clamps. There was one deviation from the plans. Because I was using a bit that differed from the recommended bit in the plans (it was out of stock), I had to adjust the placement of each divider rail that holds glass by 1/8″. As double insurance for accuracy, I also set the glass panes into the frame and set the dividers accordingly.
After the glue dried, I mounted the door to the clock frame and set the hinges. I’ve never been very good at hinges, but this time, it turned out very well. All the screws went in straight and the door swings effortlessly!
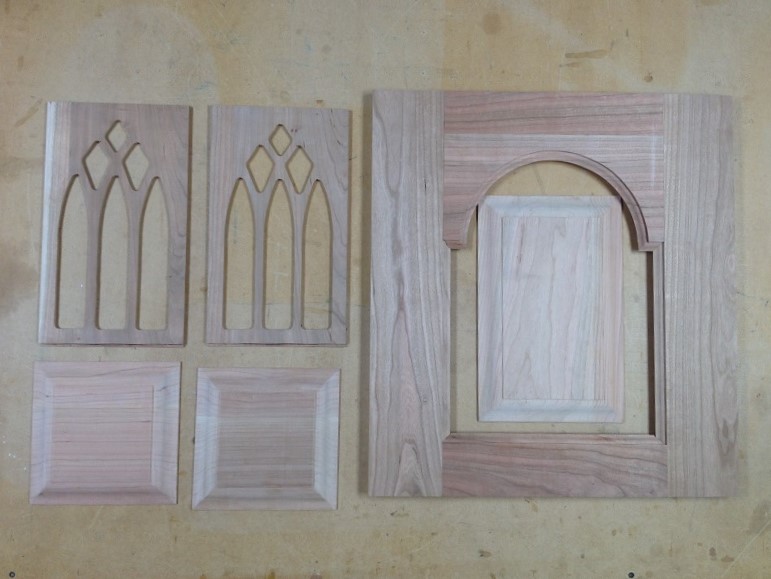
A few final pieces to finish construction!
I spent the rest of the afternoon preparing the final, smaller pieces of the project (photo right). Each side of the clock and the door get a raised panel insert at the bottom. The tops of the sides feature a decorative scroll-sawn grill panel. This is where the chimes are located. After finishing, these panels will be backed with black cloth.
The only part left to make is the back of the clock. This will be a very simple and straight-forward task at the tablesaw.
LOOKING AHEAD TO FINISHING
With the main clock frame now complete, we turn to finishing this project.

Zero to four days, starting at the bottom.
I’d read that it can take 40-50 years for cherry to age naturally into the beautiful deep crimson red that it is prized for. Online searches yielded several solutions for more immediate results. One was the use of stain. In my research, I quickly discarded this approach after reading that staining can sometimes leave a “blotchy” finish in cherry. Although it will disappear after a few years as the wood darkens naturally, I decided to go with a more subtle approach.
Many suggested shaving off a few years by subjecting the unfinished cherry to the UV rays of direct sunlight, so I performed a test (results above right). I exposed cut-off samples to the sun over a period of days. As expected, a single day of sunlight darkened the wood significantly.
 After two days, the sample was somewhat darker and after three days, a little more. It seems the darkening process looses its steam after about three days. From there on out, it’s a slow, natural progression.
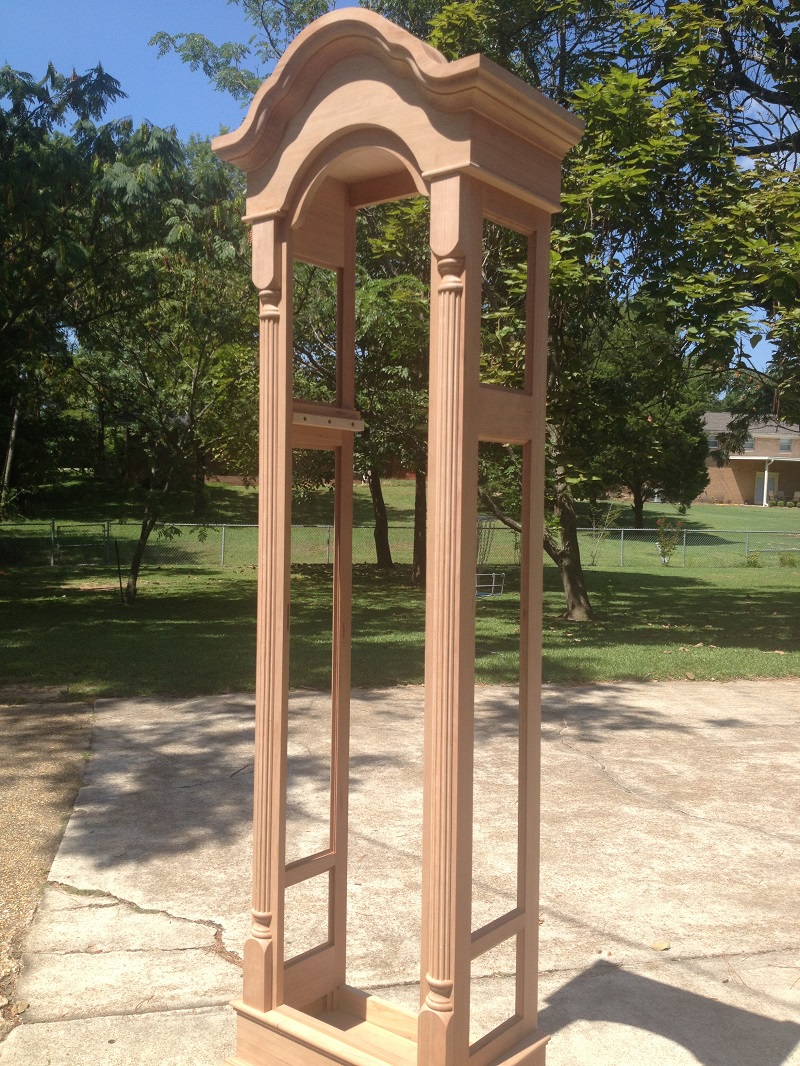
At right, I’ve included a picture of the clock frame as it sits outside getting a tan!
Believe it or not…I called a local tanning salon to see if they’d let me put the clock in one of their tanning beds! They were willing, but unfortunately, they didn’t have a machine large enough to accommodate it. But…we are going to test some sample pieces for future reference!
The plan is to finish the piece with a coat of boiled linseed oil, then several coats of a protective finish. Hopefully, in two weeks, we’ll be ready to share our finished Grandfather Clock with you!
Happy Woodworking!
Randy
Read Part 5 here.
See the finished project here.
 Disclosure: Klockit has provided me with a copy of the Columbia clock plan and components in exchange for providing a blog series of the build. I received the products at a discounted price and am under no obligation to return them.
Be the first to comment on "Grandfather Clock Build – Part 6"