

Remember, you can click on any photo for a full-size view.
One of the more challenging aspects of the clock build turned out to be one of the most rewarding thus far – the fluted columns that adorn the face frame.
To grow as a woodworker, I realize I must explore new techniques. The Columbia Grandfather Clock project is providing wonderful opportunities to learn new ways of working with wood.
Turning square stock round
Turning square stock into perfectly round columns and then adding flutes appeared to be a daunting task at first glance. It actually turned out to be a simple matter of following a pattern of progressive steps, using skills I already had. As I stated in an earlier blog, Klockit’s plans are very detailed and easy to understand.
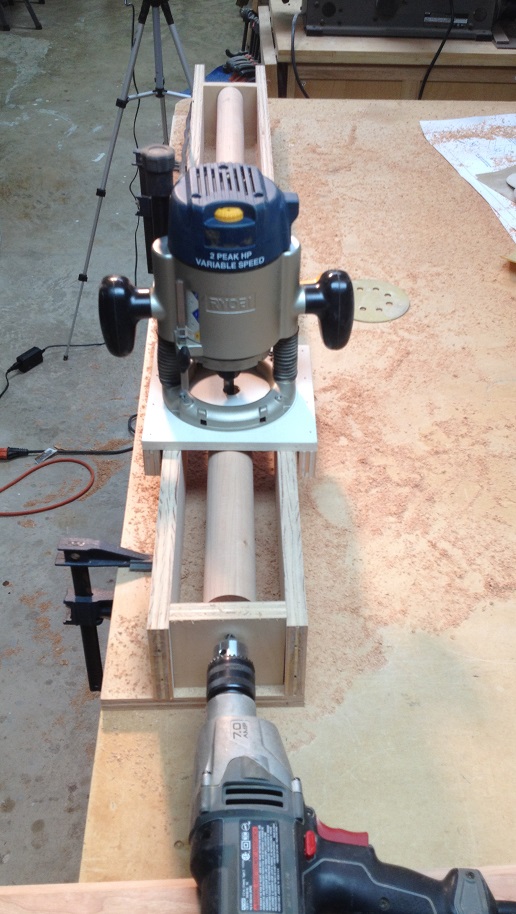
After gluing up several boards, I planed and clipped the corners to give me an octagonal column close to the 2″ diameter I needed. Because my lathe wouldn’t accept the 49″ length I need, I secured the blank in a homemade jig and used my router to “round” the column. This process included the use of a helper operating a drill to turn the column in the jig, while I used the router on the column (above right).
Fluting the column
Watch our video of the fluted column-making process here or at the bottom of this blog. Videoing is a new feature for the Sawdust Inn.
I used progressively finer sandpaper grit to make the round column smooth and silky. Yes, you read correctly. The wood was “silky” to the touch. Haha.
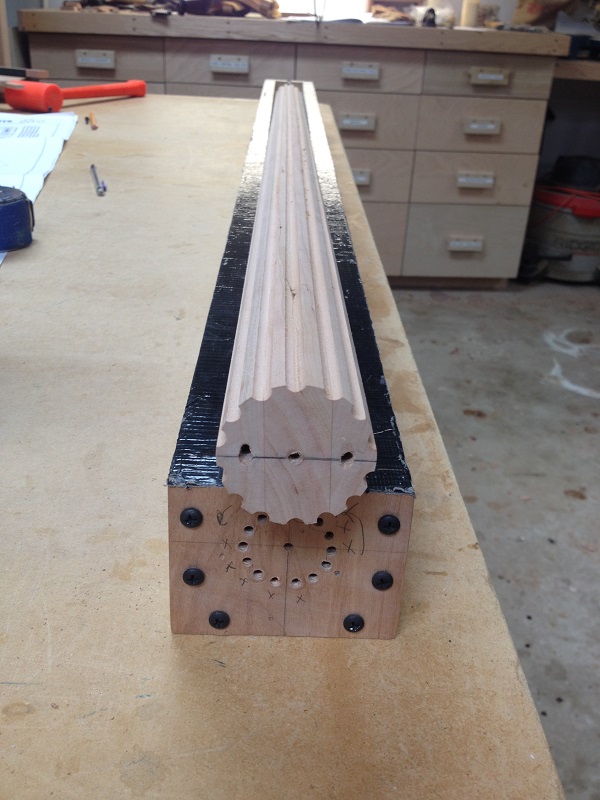
I then built a “carrier” jig to hold the round column securely in place as I ran it across a bit in my router table to create the flute. After cutting each flute, I rotated the column in the carrier according to the plans. Above right, you can see how the end block of the jig allows me to rotate and screw the column firmly in in place to cut successive flutes evenly spaced apart.
Splitting the column
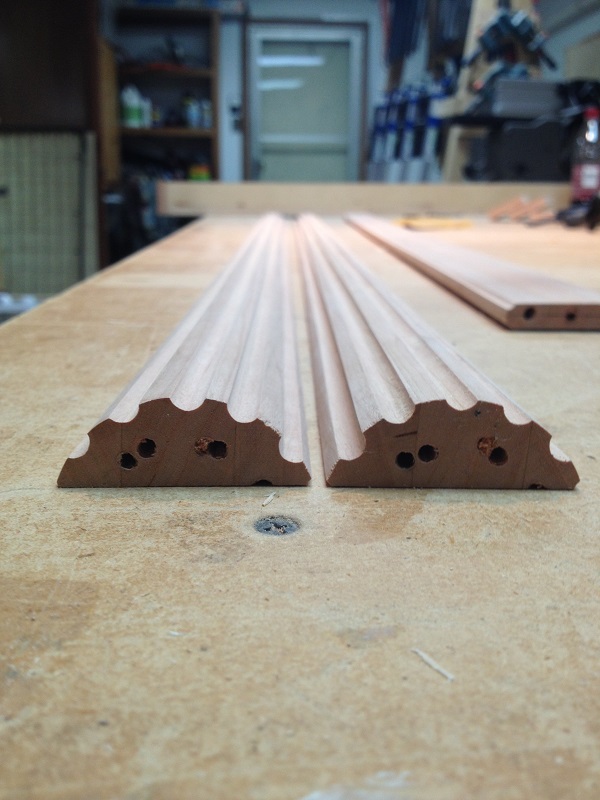
Lastly, and again using the fluting carrier jig, I ran the column through the table saw to create two “half-columns” that attach to the face frame of the clock. Then it was a simple matter of hand-sanding them and cutting them to the finished length.
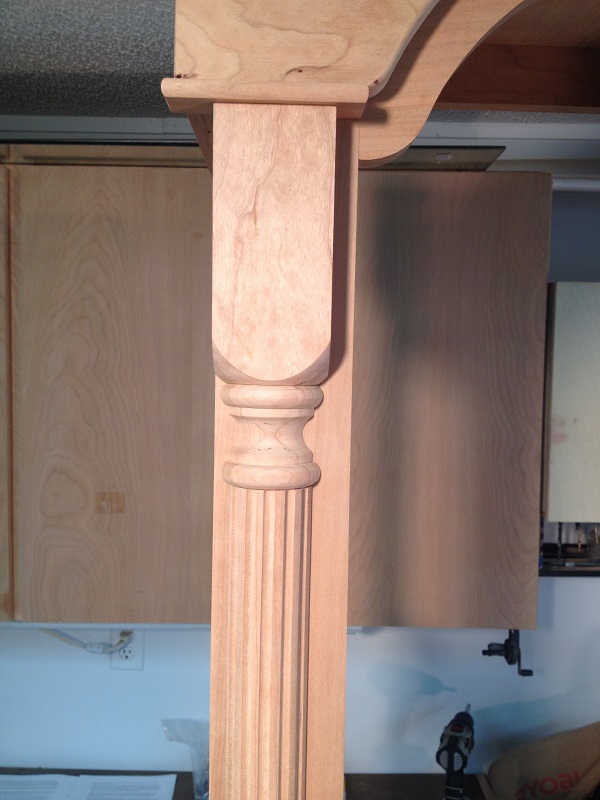
Above and below the column are decorative caps turned on a lathe. These also began a glued-up stock to create a starting square. A special shout-out goes to my friend Marty. He invited me to his shop for my very first lesson on turning! I bought a lathe about two years ago, but have never used it because I respected the machine too much to use it without training. After spending time with Marty, he says I’m ready to start practicing on my own!
Very nice!
After completing this new-to-me process, I am amazed as just how simple it actually was to make the fluted columns. At right is a photo of the top of the left frame.
I’ve begun the process of making the top bonnet for the clock. That will be the subject of our next blog.
The lessons I take from this experience are a great confidence booster in trying new woodworking techniques in the future.
Happy Woodworking!
Randy
Read Part 3 here.
Read Part 5 here.
Disclosure: Klockit has provided me with a copy of the Columbia clock plan and components in exchange for providing a blog series of the build. I received the products at a discounted price and am under no obligation to return them.
Very well done sir.
You make all we Gum Tree Woodworkers proud.
excellent video. where can I get reliable blue prints or plans for building grandfather clocks